Wednesday, February 04, 2015

Maryland Style Steamed Shrimp


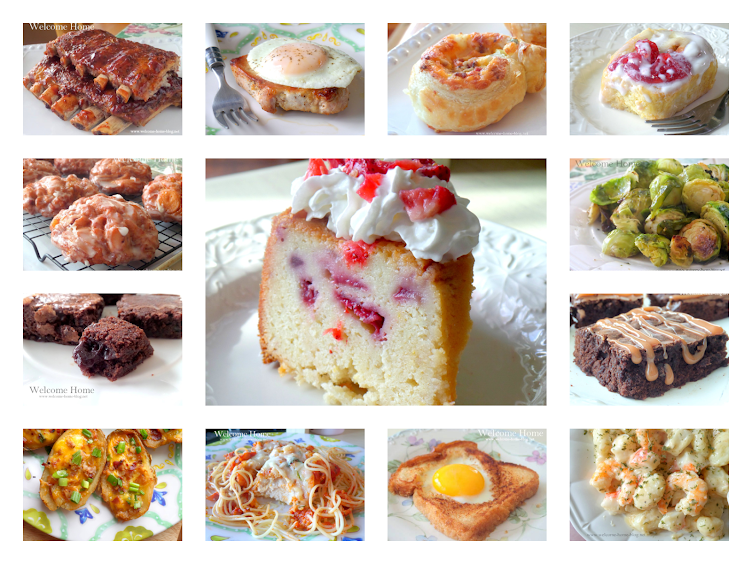
Who doesn't love shrimp!  And there's nothing better than the way we make our steamed shrimp in Maryland.  We load them down with Old Bay Seasoning and then steam them in Beer and oh my goodness you've never tasted anything like them.


Maryland Style Steamed Shrimp

1/2 cup beer (you can also use apple cider vinegar)
1 tablespoon of celery seed
4 cups of water (stay beneath the steaming basket or rack)
1/2 cup OLD BAY® Seasoning
2 pounds large shrimp, peeled and de-veined, tails on


Prepare Shrimp by de-veining them.  Leave the tails on.


Sprinkle a generous amount of Old Bay seasoning on shrimp and toss to cover well. Set aside.

In the bottom of your steamer, mix beer, celery seed and 1/2 tablespoon of Old Bay. Bring to boil on medium heat.


Lay shrimp in your steaming basket and sit on top of boiling liquid.


Cover and steam 2 to 3 minutes or just until shrimp turn pink.


Remove to a plate and serve with your favorite cocktail sauce.
 
NOTE:  Don't have a steaming pot?   Make one!   Use an 8 court stock pot for the bottom and a metal colander for your basket.  Cover and steam! Works great!

Photographs are the property of and copyrighted to ©Welcome Home.
Print Friendly and PDF

Tuesday, February 03, 2015

♥ Peanut Butter Fudge Brownies


This past summer I baked for a church bake sale to raise money for the homeless in Maryland. I made cupcakes, brownies, and cookies keeping in mind that the better they taste and look, the better chance they will sell. These were an instant hit and I think you will like them too! Rich fudge layers with slightly salted peanuts and a hint of caramel make them a winner!

 
Peanut Butter Fudge Brownies

10 tablespoons butter
1 1/4 cups granulated sugar
3/4 cup plus 2 tablespoons unsweetened cocoa powder
1/2 teaspoon salt
1 teaspoon vanilla extract
2 large eggs
1/2 cup all-purpose flour
1 cup of salted peanuts
Topping: Caramel ice cream topping

Brownies:
Preheat oven to 325 degrees. Line the bottom and sides of two
9 x 13-inch baking pan with parchment paper. Allow the paper to drape slightly over sides as these will be your handles for lifting later.

Next, lightly grease the paper in both pans and set aside. Combine the butter, sugar, cocoa, and salt in a medium microwave-safe bowl. Microwave for one minute intervals, stirring in between, until the butter is melted and the mixture is smooth. Set the mixture aside until it cools to room temperature or put it in the refrigerator until cool. 


After batter has cooled, stir in the vanilla. Add the eggs one at a time, stirring vigorously after each one. When the batter looks thick, shiny, and well blended, add the flour and stir until well combined. Then by hand, add peanuts and beat vigorously for 40 strokes with the wooden spoon. Spread a third of the batter in one pan (this will be your bottom layer) and the remaining batter in the other (this will be your top layer). 

Bake until a toothpick inserted into the center emerges slightly moist with batter, 20 to 25 minutes for the larger pan of batter and only about 10-15 minutes for the lesser brownie batter. Check each pan for with toothpick to make sure they are done. Let pans cool completely on a rack or in the refrigerator.

Peanut Butter Fudge

1 cup smooth peanut butter
1 cup (2 sticks) butter
1 teaspoon salt
1 tsp. vanilla extract
3 1/2 cups powdered sugar

Bring butter and peanut butter to a boil in medium saucepan over medium-high heat, stirring occasionally until combined and smooth. Remove from heat and stir in salt and vanilla until combined. Gradually add in powdered sugar, stirring until combined. Then immediately add fudge to brownies by spreading and smoothing with a rubber spatula. Cover and refrigerate for at least 1 hour, or until the fudge has set.

Then carefully add the top layer of chocolate fudge brownies by lifting them carefully out of the pan by pulling on the parchment paper and converting them on top of the layer of peanut butter. Push down slightly to blend all the layers. Then lift the entire three layers using the parchment paper handles of the first batter. Set on a cutting board or counter and cut into squares. Drizzle each square with caramel.

Photograph is copyrighted and the property of ©Welcome Home.
Print Friendly and PDF

Saturday, January 31, 2015

SEE A SAMPLE OF THE NEW FEBRUARY ISSUE OF THE MAGAZINE


Click on LINK below for a sample of the new issue of the Welcome Home Online Magazine that will be here tomorrow. 

CLICK HERE:   Video Playback

There are already over 200 never before seen recipes and now I bring you 30 more! It's only $2.00 an issue for a full year subscription. 

You can subscribe by clicking on the tab called Magazine at the top of this blog. Or click here and it will take you there.  

http://www.welcome-home-blog.net/p/my-store.html

Please help me save lives. Please donate today by subscribing! I have a lot of dogs and cats to save and a lot of Homeless people to feed. I need your help.

CLICK HERE:   Video Playback
Print Friendly and PDF

Tuesday, January 13, 2015

Olive Cheddar Pinwheels


What do you do when you have that single can of crescent rolls in the fridge and a half a jar of olives?  You create a recipe that is out of this world delicious!  The olives and the cream cheese are a winning combination in this delightful recipe and you'll call this a keeper my friends!  

Olive Cheddar Pinwheels

1 can refrigerated crescent rolls
1 (4 oz) package of cream cheese, softened to room temperature
1/2 cup of shredded sharp cheddar cheese
1 Tablespoon mayonnaise
1 tablespoon Star Fine FoodsButter Flavored Olive Oil


Preheat oven to 400 degrees.

Combine cream cheese, shredded cheese, mayonnaise, olives, in a mixing bowl.


Open and unroll the can of crescent rolls onto a large piece of non-stick parchment paper or on a non-stick baking sheet. Press seams together to form a rectangle. With a rubber spatula, spread the cream cheese mixture over top of the dough leaving about 1/2 inch edge all around.

Start rolling into a log, using your fingers to keep it tightly rolled. Brush log with butter flavored olive oil. Cut log into slices and lay cut side down on an un-greased cookie sheet.


Bake for 10-12 minutes until pinwheels are a light golden brown. Serve warm from the oven.


STAR olives are available at select Safeway, Vons, King Soopers, Ralphs, Smiths, Savemart,

Raley’s, Lucky, Food 4 Less, Smart & Final, Bashas, Walmart, Thom Thumb and Randall’s stores 

and online at http://shop.starfinefoods.com/STAR-Olives/c/Star@Olives.

Photography is the property of and copyrighted to ©Welcome Home
Print Friendly and PDF

Sunday, January 11, 2015

WELCOME HOME IS NOW ON INSTAGRAM!


Hello Friends! You can now find Welcome Home on INSTAGRAM! 

http://instagram.com/welcome_home_friends/

I have posted some of my favorite recipes there this morning for all of you who love Instagram and I will continue to post there frequently so that you will have some alternatives to Facebook.

If you are an Instagram user, I would love for you to follow me there. Simply click, on this link and it will take you to Welcome Home Friends. 
Print Friendly and PDF

Wednesday, January 07, 2015

♥ Quick and Easy Chicken And Dumplings


You say, "how did you make homemade chicken and dumplings so quickly?" It's easy. It took me all of 15 minutes. My secret was a store bought rotisserie chicken and Bisquick. Now don't knock Bisquick. It has all the same exact ingredients you use to make dumplings from scratch...things right out of your pantry. Here's the recipe. I even show you how to make your own Bisquick for those of you who can't get it in your country.


Quick and Easy Chicken And Dumplings

(Bisquick drop dumplings)

1 Rotisserie Chicken, skins and bones removed.
1 container of chicken stock
1 cup of water
Pepper to taste
2 cups of Bisquick
2/3 cup half and half (or more as needed)
1/2 teaspoon salt
fresh parsley for garnish

Pour chicken stock and water into large pot and bring to a boil. Add salt and pepper. Cut off pieces of chicken and drop into boiling liquid. I use mostly the dark meat as it gives off more flavor. You can add as much chicken as you want. Cook for 5 minutes. Turn heat down to medium high and remove chicken with a slotted spoon and set aside.


Mix Bisquick and half and half until you form a soft dough. Drop by large rounded spoonfuls into slow boiling liquid. Turn down heat to low and cover pot. Cook on low heat for about 10 minutes until dumplings no longer doughy in the middle. Carefully add chicken pieces making sure you do not disturb dumplings so they do not break apart. Turn off the heat and serve. 

HOMEMADE BISQUICK

5 cups all purpose flour
3 tablespoons baking powder
2 teaspoons salt
1 cup shortening or very cold butter


Photo source: www.homesweethomemade.com
In large mixing bowl combine flour, baking powder and salt. Cut in shortening with pastry blender or two knives. I use my hands to blend into a fine sand-like mix. If you use cold butter, store in a container in the refrigerator for up to 6 months. If you used Crisco or any other shortening, store in an airtight container in your pantry for up to 6 months.


Photograph is copyrighted and the property of ©Welcome Home 2014.
Print Friendly and PDF