Friday, September 30, 2016

♥ Walnut Cheesecake Bars


Love these little cheesecake bars and I made them this past weekend to give to some friends that stopped by. They loved them too! So easy to make and so delicious. You can use whatever nuts you like. This time I used walnuts but I have also used pecans and toasted almonds for change now and then. Click on photo for a closer look at the creamy texture.

 Walnut Cheesecake Bars

Preheat oven to 350 degrees. Line a 13 x 9-inch pan with foil and grease bottom and sides.

Crust:
2 cups unbleached all-purpose flour
1 teaspoon baking powder
1/2 teaspoon salt
1/2 cup butter, softened
1 cup granulated sugar

To make the crust, in a medium bowl, sift together flour, baking powder and salt. In a large bowl, using a mixer on medium speed, beat together butter and sugar until creamy, about 1-2 minutes; reduce mixer speed to low and beat in flour mixture until just combined and crumbly. Press mixture into bottom of prepared pan. Bake for 10 minutes or until light golden around edges; remove from oven. 


Filling

16 ounces cream cheese, softened
1/2 cup sugar
2 eggs
2 tablespoons lemon juice
1 tablespoon vanilla extract
2 tablespoons milk

Mix cream cheese and sugar with electric mixer on low until smooth. Add remaining ingredients and stir gently until mixed. Pour batter into the baking dish over the prepared baked crust. Bake for 20 minutes at 350 degrees. Don't bake too long, or filling will be dry and not creamy.

 Topping

1 cup packed brown sugar
3/4 cup unbleached all-purpose flour
1/2 cup finely chopped walnuts,
3/4 teaspoon ground cinnamon
1/4 teaspoon salt
6 tablespoons cold unsalted butter, cut into small pieces

To make the topping, in a medium bowl, stir together brown sugar, flour, walnuts, cinnamon and salt, until combined; add in butter using fingertips or a fork, until ingredients are well incorporated and start to clump together. Sprinkle the crumbly mixture evenly over the cheesecake filling. Return pan to oven and bake an additional 10 minutes or until golden brown. Remove from oven and cool for an hour. Slice cheesecake into rows, 3 x 5 to make 15 bars.


Photograph is copyrighted and the property of ©Welcome Home.
Print Friendly and PDF

Saturday, September 17, 2016

Pork and Apple Pot Stickers


I love pot stickers and they're not that hard to make at home. I like to make my own because I don't always like what they put in them. For example, I learned to put a little apple in my pork pot stickers to make them so much better than the ones you get already pre-made.

Pork and Apple Pot Stickers

Filling

1 tablespoon oil
1 medium onion, finely chopped
1 medium Fuji or Gala apple, finely chopped
1 tablespoon freshly grated ginger
2 garlic cloves, finely minced
¼ cup rice vinegar
¼ cup apple juice
1 lb lean ground pork
2 tablespoons soy sauce
½ cup scallions, finely diced

Heat oil over medium heat in a large skillet. Add the onion and apple and cook for 5-7 minutes or until softened. Add in the garlic and ginger and cook for another minute. Next, add your rice wine vinegar and apple juice and cook for about 10 minutes or until the liquid has cooked away. Set aside and allow to cool.


Combine the mixture with the ground pork in a mixing bowl. Pour in soy sauce and chopped scallions and stir to blend well. Chill in fridge for at least 30 minutes.

Won Tons

1 egg, beaten for egg wash
1 package (50 count) round dumpling wrappers
2 tablespoons cooking oil
1 tablespoon butter

Lay your won ton or dumpling wrappers on parchment paper and lightly brush edges with egg wash. Place ½ tablespoon of the filling in the center of each wrapper and fold over in half, sealing the edges with fingers by making pleats. See comment section for photo. Gently press the pot stickers down on the work surface to flatten the bottoms so they stand upright.

Add oil and butter to a large skillet. Heat over medium-high. Working in batches, fry the pot sticker in the hot butter and oil until crispy ...about 3 minutes. 


After about 3 minutes, stand back and add ¼ cup of water and immediately cover pan to avoid any splattering. Steam until the pot stickers are puffy yet firm and all the water has evaporated, about 5-7 minutes. Remove lid and cook for an additional 1-2 minutes so that the bottoms can retain their crispiness. Transfer to a serving platter and continue with the remaining pot stickers. Serve warm with the dipping sauce.

For the Dipping Sauce:

¼ cup soy sauce
2 teaspoons toasted sesame oil
1 tablespoon honey
Pinch of red pepper flakes

Whisk all ingredients together in a bowl. Set aside until ready to serve.


 Photography is copyrighted and the property of ©Welcome Home.

Print Friendly and PDF

Tuesday, September 13, 2016

♥ Pumpkin Spice Cake with Cream Cheese Frosting


This is a cake I make as soon as pumpkin season rolls around. It's rich and delicious and the cake is so moist you can't get enough of it. The cream cheese frosting is to die for! I store mine in the refrigerator and eat it cold! So Good!

Pumpkin Spice Cake with Cream Cheese Frosting

2 cups sugar
1 cup vegetable oil
4 large eggs
2 cups all-purpose flour
3 teaspoons ground cinnamon
1/2 teaspoon ground ginger
1 teaspoon baking powder
2 teaspoons baking soda
1/2 teaspoon salt
2 cups pumpkin puree (not pie filling)

Preheat the oven to 350 degrees. Grease and lightly flour two 9” x 2” cake pans, then tap out the excess. In a large bowl, whisk together the flour, cinnamon, ginger, baking powder, baking soda, and salt.


In a separate large bowl, whisk the sugar and oil. Add the eggs and whisk well to combine. Stir in the pumpkin puree. If you cannot find Libby's or any other brand of puree, you can buy Pure Pumpkin in a can and put it in the food processor or blender and puree it yourself.

Stir in the dry ingredients until the mixture is smooth and well combined. Divide the batter evenly among the two pans. Bake for about 35-40 minutes, or until a toothpick inserted in the center comes out clean. Let the cakes cool in their pans on a wire rack for 30 minutes, then turn out to cool completely before frosting.

Cream Cheese Frosting

1/2 cup butter, softened
8 oz. cream cheese, softened
4 cups confectioner’s sugar
1 teaspoon vanilla extract

In a large bowl, cream the butter and cream cheese. Add the vanilla extract. Slowly beat in the sugar, scraping down the sides of the bowl halfway, until the mixture is smooth and fluffy.

Frost cooled cake on top and sides and use leftover frosting to decorate cake using a piping bag.

Photograph is copyrighted and the property of ©Welcome Home.
Print Friendly and PDF

Italian Wedding Soup


I love this soup and make it often. I love everything about it from the tiny little orzo pasta to the little meatballs and all the other wonderful ingredients. It is hearty and delicious and just gets better each day until it's all gone!   As a matter of fact my recipe won first place in the Best 250 Italian Wedding Soup Recipes On The Net! 


Italian Wedding Soup
 

Meatballs:

1 small onion, grated
1/3 cup chopped fresh Italian parsley
1 large egg
1 teaspoon minced garlic
1 teaspoon salt
1 slice fresh white bread, crust trimmed, bread torn into small pieces
1/2 cup grated Parmesan
8 ounces ground beef
8 ounces ground pork
Freshly ground black pepper

For the meatballs: Stir the first 6 ingredients in a large bowl to blend. Stir in the cheese, beef and pork. Shape the meat mixture into mini meatballs. Place on a baking sheet. Bake at 350 degrees for 10-15 minutes or until meatballs are done.


Soup

1 tablespoon olive oil
2 tablespoons butter
2 cups diced onion
1 cups finely diced carrots
2 large garlic cloves, peeled and minced
4 quarts chicken broth
3/4 teaspoons of dried oregano
3/4 teaspoons dried basil
10-ounce box frozen chopped spinach
salt and pepper to taste
2 2/3 cups uncooked orzo, or other small, round Pearl shaped pasta

Melt butter and olive oil in large soup pot or Dutch oven. Add onions and carrots and saute until onions are tender. Add garlic and continue stirring for two or three more minutes. Then add your chicken broth and the oregano and basil and bring to low boil for about 5 minutes.


Add the frozen spinach to the broth mixture and break it up as it thaws. Lower heat and simmer for about 15 more minutes as it cooks. Gently drop the meatballs into the soup. Simmer the soup for 30 minutes or so, then stir in the pasta, cooking till it's al dente. For orzo, this will take about 8 minutes or so. Add more salt and pepper to taste if needed.

Photograph is the property of and copyrighted to ©Welcome Home 
Print Friendly and PDF

Tuesday, September 06, 2016

Brussel Sprouts in Butter


Brussel Sprouts in Butter

Who out there loves Brussel sprouts?

These were boiled in water with a teaspoon of sugar added. I did a slow boil until they were tender then I drained them...added butter and salt and a little pepper. Yum! 

I also grill them, roast them, and steam them. Sometimes I add bacon and onions and garlic...sometimes I just like them with butter!


My Mom used to tell me I called them baby cabbage balls when I was really little. LOVE my brussel sprouts!  Do you?


Photography is the property of and copyrighted to ©Welcome Home.


Print Friendly and PDF

Mom's County Ham Loaf


I can still remember my Mom grinding up leftover Easter ham in an old meat grinder that was clamped onto the kitchen counter. She would turn that wheel and grind it all up to put in her famous ham loaf. Oh my goodness it was so good. We loved it better than the Easter ham! I still make it today with my leftover ham and I still like it better than ham. Things are easier these days. No more grinders and hard work to get it to the right consistency. I trim off any fat and cut my ham into one inch chunks and put it in the food processor. Works perfectly to give you the perfect texture. 

Mom's Country Ham Loaf 

1 lb. fresh ground ham 
1 lb. fresh ground pork 
½ cup saltine crackers, crushed 
½ cup plain bread crumbs 
1 egg, well beaten 
1 teaspoon salt 
1/2 teaspoon pepper 
1½ tbsp. chopped fresh parsley 
3/4 cup milk, more if needed 
To make ground ham, cut fully cooked ham into one inch cubes and process in a food processor until ham in finely ground. 


Preheat oven to 350 degrees. In a large bowl, combine ham, pork, bread crumbs, parsley, salt and pepper, egg and milk. Using clean hands, mix until combined. Mixture should be moist and very soft. If too dry, add up to ½ cup of extra milk.
Form into one large loaf  and place in a greased 9 x 13 inch baking dish or make two smaller loaf sized. 


Glaze 

2/3 cup brown sugar 
1 teaspoon dry mustard 
1/2 cup water 
1/4 cup apple cider vinegar 

In a small saucepan, combine glaze ingredients and stir over medium heat until sugar is dissolved. Pour about one-third of glaze over ham loaf. Cover with foil and bake for 50 minutes. Remove ham loaf from oven and uncover to pour remaining glaze over loaf. Glaze will begin to get thick and sticky as ham loaf continues to bake and brown. Cooking time should be about 90 minutes or up to 2 hours for larger loaf made in 9 x 13 pan. 
Photography is the property of and copyrighted to ©Welcome Home.
Print Friendly and PDF

Thursday, September 01, 2016

Sopapilla Cheesecake


I used to look at those cans of Pillsbury dough on the refrigerator shelf in the grocery store and think nothing of them...other than they are just a quick way to throw out some biscuits when you're running short on time.  And we all know that while they are convenient, they don't taste anything like homemade. 

But then one day something happened.  I had a revelation of sorts when I thought about what is really in those cans....it's just pre-made dough!  And a whole new world opened up for me.  Now I look at those cans and think of appetizers, side dishes, main dishes and desserts!  Desserts that are incredible and truly unforgettable! Next time you pass by that canned dough....throw some in your cart and think delicious! 

Sopapilla Cheesecake

2 cans (8 oz. each) refrigerated crescent dinner rolls
2 (8 oz. packages) cream cheese, softened
1 1/2 cups sugar (divided)
1 teaspoons vanilla
1/2 cup butter, melted
1 teaspoon cinnamon

Preheat oven to 350 degrees.  Keep the cans of dough in the refrigerator until ready to use.  Then unroll one and using fingers spread it out flat on the bottom of an ungreased 9 x 13 glass baking dish. Press out any seams.


In a medium bowl, mix together the cream cheese, 1 cup of the sugar and the vanilla extract until creamy and smooth.  Pour the mixture over dough in pan and using a spatula, spread evenly.  


Unroll the second roll of dough and gently lay it evenly on top of the cream cheese mixture.  Pour the melted butter evenly over the top layer of the dough.  Mix the remaining 1/2 cup of sugar with the cinnamon and sprinkle evenly over the butter mixture. 

Bake for 30 minutes.  Cool for 20-30 minutes before serving warm.  Cover and refrigerate.


Photography is the property of and copyrighted to ©Welcome Home.
Print Friendly and PDF

Simple Brownie Cheesecake


Here's one of my quick and semi-homemade recipes that tastes just like you made it all from scratch. A short cut to making a much more complicated dessert, this one is so simple to make and so delicious! You might even have to have that second slice just to make sure!

Simple Brownie Cheesecake

1 pkg. (19 to 21 oz) Brownie mix (13 X 9 inch pan size)
pkg. (8 oz. each) Cream Cheese, softened
1 cup sugar
1 teaspoon vanilla extract
1/2 cup sour cream
3 eggs
2 squares Baker’s Semi-Sweet Chocolate, melted in microwave for drizzle

Heat oven to 325 degrees. Prepare brownie batter as directed on package; pour into 13 x 9 inch pan sprayed with cooking spray. Bake 25 minutes or until top is shiny and center is almost set.

Meanwhile, beat cream cheese, sugar and vanilla in large bowl with mixer until well blended. Add sour cream; mix well. Add eggs, 1 at a time, mixing on low speed after each just until blended. Pour over brownie layer in pan. It will almost fill your pan.

Bake 40 minutes or until center is almost set. Run knife or metal spatula around rim of pan to loosen sides; cool. Refrigerate 4 hours. Drizzle top with chocolate topping.

Photograph is copyrighted and the property of ©Welcome Home.
Print Friendly and PDF

Friday, August 26, 2016

♥ Beef Stroganoff


One of my personal favorites! I love my country rendition of Beef Stroganoff...well, I can't really call it Stroganoff because I have left out a lot of the ingredients that might go into that classic dish.  But even without the mushrooms, sour cream and other things that go into Stroganoff, this is delicious. I actually like this better! I start off by finding the perfect chuck roast in the meat case and I ask the meat clerk to trim the fat and cut it into beef cubes for me.....

Beef Stroganoff

2 pounds beef chuck roast, trimmed and cubed
1 small onion, chopped
1 clove garlic, minced
salt and pepper to taste
1 tablespoons olive oil + 2 tablespoons butter for frying
4 tablespoons of flour
4 tablespoons (1/2 stick) butter
2 cups half and half (half milk/half cream)
1 (16 oz) package egg noodles

Melt butter in a large heavy skillet and then add olive oil. Over medium heat, saute onions and garlic until tender. Add beef cubes and fry until brown on all sides. Cover and simmer on low heat for about an hour or until meat is very tender. You can also pre-cook beef cubes in a crock pot for 6 hours on high with a little beef broth for fork tender beef for all your stews and soups. I do this often and freeze until I need them.

In a separate skillet, add 4 tablespoons of butter and 4 tablespoons of flour and whisk quickly to blend. Cook, for about 1 minute and lightly browned, stirring the entire time. Whisk in half and half and continue whisking until sauce begins to thicken. Turn off heat and salt and pepper to taste. I like a lot of pepper in mind.

Finally, pour your sauce into the skillet with your meat and with a wooden spoon stir, making sure that you scrap all the bits of meat and garlic and onion from the bottom. Cover for another 10 minutes while noodles cook.

Boil egg noodles as directed on package. Drain well and pour into bowl. Add meat and sauce over noodles.

Photograph is copyrighted and the property of ©Welcome Home.


Print Friendly and PDF

Ground Beef Stroganoff


I love these quick one skillet meals don't you?  So easy to make and so 
good! 

Ground Beef Stroganoff


1 lb ground chuck, browned 
salt and pepper to taste
1 box egg noodles, cooked and drained
2 cloves garlic, minced
1 small onion, chopped
2 tablespoons butter
2 1/4 tablespoons all-purpose flour
1 cup heavy cream or half and half
1/2 cup of beef broth

Brown beef in large skillet. Add salt and pepper to taste. Drain beef, pour in bowl and set aside. Using same skillet, saute onion and garlic until tender. Add beef back in and stir.

In large deep skillet, melt butter. Add flour and whisk for a full minute until lightly golden. Slowly pour in cream whisking until incorporated. Whisk in beef broth and stir as sauce thickens. Taste and add salt and pepper as needed. Simmer on low heat until egg noodles are ready.

Cook egg noodles according to package directions. Drain well and serve with stroganoff.

Photo source: flickriver mooshee85


Print Friendly and PDF

Wednesday, August 24, 2016

HOW DO I SUBSCRIBE?


For those of you who are thinking about subscribing to the Welcome Home Online Magazine but have a few questions, now is the time to ask. Please feel free to ask any questions in the comment section under this post. Here are a few that have been asked before:

Q: Are the recipes the same as the recipes on Welcome Home 
Facebook or in your Blog?
A: No. I put my best recipes and photographs in the Magazine. 
They are exclusive and are published no where else but the 
magazine.

Q: Is it a print magazine that I can have mailed to my home?
A: No. This is a private online blog website that you can access with 
your own personal link and code. Once you subscribe, you simply go to the website and it will recognize your email address and allow you full access to the magazine.

Q: How many recipes do you publish and how often?
A. I publish recipes daily. The magazine began in 2014 and so
far there are over 700 recipes published in the magazine.

Q: Are there photos of the finished dish with each recipe?
A: Yes. All recipes have several full sized photos showing the finished dish. Some of the recipes have step by step photographs showing you how to make the dish.


Q: Are their advertisements that fill up the magazine with unwanted photos and hype?
A: There are no advertisements in the magazine. Only recipes, photos, kitchen how to's and tips, and helpful gadgets that make life easier in the kitchen.

Q: How will I know when a new recipe is posted in the magazine?
A: As a bonus for subscribing to the magazine, you will become a member of my Welcome Home Magazine Fan club. This is a private group on Facebook for subscribers only. You will find an announcement of every new recipe each day, along with even more recipes, hints, tips, etc.


Q: How much is it?
A: The Welcome Home Online Magazine is only $2 a month ($24 a year). You can renew each year for more recipes. Some of the proceeds from the subscriptions to the magazine go to my Save A Life mission and are used for saving the lives of dogs and cats killed unnecessary in shelters. And some of the proceeds go to feeding the hungry and helping the homeless.

Q: What kind of recipes do I feature in the magazine?
A. There are recipes that everyone can enjoy. There is a full line up of every kind of recipe you can imagine, from Asian to Mexican to southern style cooking. From Lettuce Wraps to Nachos to Chicken and Dumplings and cornbread! You'll find that home style cooking with a southern flare is my specialty. Comfort food at its best!

Q: Can I see any sample photographs of what I can expect to see each day in the magazine?
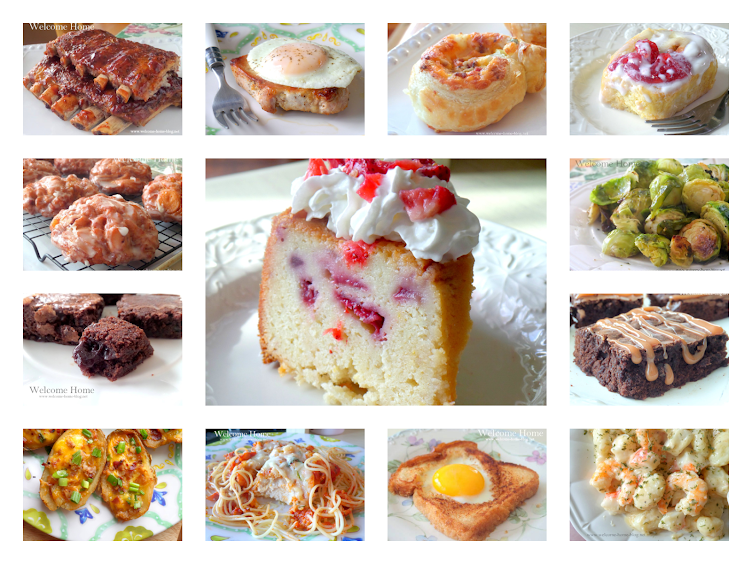
A: Yes. The photos in the collage with this post and the ones in the comment section are actual photos of my recipes in the magazine. You will find nearly 700 more just like them when you subscribe.


Q: How do I subscribe:
A: Follow these simple steps and you'll have access to the magazine in minutes.


2. Click on the Subscribe Today button at the top of the page.


3. That will take you to PayPal so you can pay with your PayPal account or with a credit card.
Print Friendly and PDF