Sunday, August 03, 2025

The French Omelete

The French Omelete


An omelet is an omelet, right?  Nope. 

You are probably used to seeing the classic all American omelet but there is another one that is quite different.  The French Omelet.

The key difference between a French and a classic (American) omelet lies in their cooking method and resulting texture: French omelets are light, fluffy, and creamy, rolled up in the pan, while classic omelets are denser, with a slightly browned outer crust, and folded in half. 


A French omelet is whisked with a fork while the eggs cook to create a structure more like scrambled eggs and then rolled into a thin log. The key word is cold butter when making a French Omelet…and they use lots of it.


An American omelet uses a dragging method to push the cooked eggs to the inside and the uncooked egg to the outside; this method gives you a flatter omelet. Usually stuffed with veggies and other ingredients and not so delicate.  Below is a Classic American Omelet.


A French omelet, on the other hand quite the delicacy. Its exterior is smooth as silk, its inside moist and creamy, a roll of tender egg cradling a custard like filling of those very same eggs, softly scrambled.  The eggs are cooked on low heat for an extended period. This gives them a rich taste and makes them fluffy. They contain only cheese and herbs, with no meat or vegetables.


French Omelet


1 teaspoon Dijon mustard

2 tablespoons water

1/2 shallot, finely minced

Kosher salt and freshly ground black pepper

1/4 cup extra-virgin olive oil

4 tablespoons minced fresh chives

3 tablespoons unsalted butter plus 4 tablespoons cold unsalted butter, cut into small cubes

8 large eggs, beaten

1 cup grated Gruyere


Combine the Dijon mustard, shallot and water in a large bowl. Season with salt and pepper. Slowly whisk in the olive oil and 3 tablespoons chives. Set aside.


Melt 2 tablespoons butter in a 12-inch nonstick pan over medium heat. When the butter starts to bubble, add the eggs and the cold cubed butter, and begin to stir with a rubber spatula. Continue to stir until the eggs are half set, then reduce the heat to low.


When the omelet is soft, sprinkle with salt and pepper, and top with the cheese on one side. Let the omelette sit over low heat, without touching it, for 1 minute, to let the heat of the pan set the eggs. 


Roll the omelet over the cheese so it forms a jelly roll shape, then roll the whole omelet onto a large dish. 


Lightly spread the remaining tablespoon butter over the omelet to coat. Garnish the omelet with the remaining tablespoon chives.


Photography is the property of and copyrighted to Welcome Home.

Print Friendly and PDF

Saturday, August 02, 2025

Chocolate Chip Ice Cream Sandwich Cookies


 Cold and creamy vanilla ice cream sandwiched between two wonderful chocolatey chewy cookies. The perfect summer comfort food!

 Chocolate Chip Ice Cream Sandwich Cookies

 1 1/4 cups all-purpose flour

1/2 tsp baking soda

1/4 tsp baking powder

1/4 tsp salt

1/2 cup unsalted butter, room temperature

6 tbsp granulated sugar

1/4 cup packed light brown sugar

2 large egg yolks

1/2 tsp vanilla extract

1 1/2 cups mini chocolate chips, divided

Half gallon vanilla ice cream


Preheat oven to 350°F. Line baking sheets with parchment paper or silicone baking mats. Set aside. 

Combine the flour, baking soda, baking powder and salt in a medium sized bowl and set aside.


Cream the butter and sugars together in a large mixer bowl on medium speed until light in color and fluffy.

Add the egg yolks and vanilla extract and mix until well combined.

Add the dry ingredients and mix just until the dough is well combined. It will be thick and shouldn’t be too sticky. Do not over mix.

Once it’s well combined, add 1/2 cup mini chocolate chips and use a rubber spatula to fold it all together.


Create 1 1/2 tablespoon sized balls of cookie dough. Gently roll into a ball, then press down and flatten out the cookies a bit. Use an additional 1/4 cup of mini chocolate chips to press some additional chocolate chips into the top of the cookie dough balls, then place on cookie sheet.

Bake cookies for 7-10 minutes. The cookies will spread and the centers will look soft, but should look done. Remove just before the edges begin to turn golden. Don’t over bake. The cookies may look a little puffy when you take them out of the oven but will fall a bit as they cool. They should be relatively thin. 

Remove from the oven and allow to cool on baking sheets for 4-5 minutes before transferring to a wire rack lined with parchment paper to cool completely. If the cookies aren’t nicely round, use a spoon to push the edges in and make the cookies round.

When the cookies have cooled, place them in the freezer to firm up for about 20-30 minutes.

After about 30 minutes, get a cookie and add about 1/4 cup (4 tablespoons) of ice cream on top and spread evenly with the back of a spoon. Work quickly. Top the ice cream with a second cookie and place the cookie sandwich back into the freezer.

Continue working with the cookies and ice cream until you’ve made all of the ice cream sandwiches.

Allow them to freeze for 2-3 hours so that the ice cream is fully frozen. Next, dip the sides into the remaining 3/4 cup of mini chocolate chips. 

Put the finished cookie sandwiches back in the freezer until ready to serve.


Notes

You can store these in an airtight container with parchment paper separating them or wrap them individually in plastic wrap. They should be good for a week or so.


 Photography is the property of and copyrighted to Welcome Home.

Print Friendly and PDF

Monday, July 28, 2025

Mac and Cheese Pot


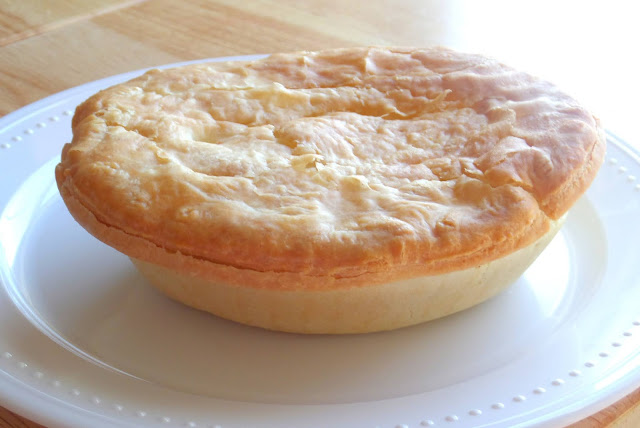
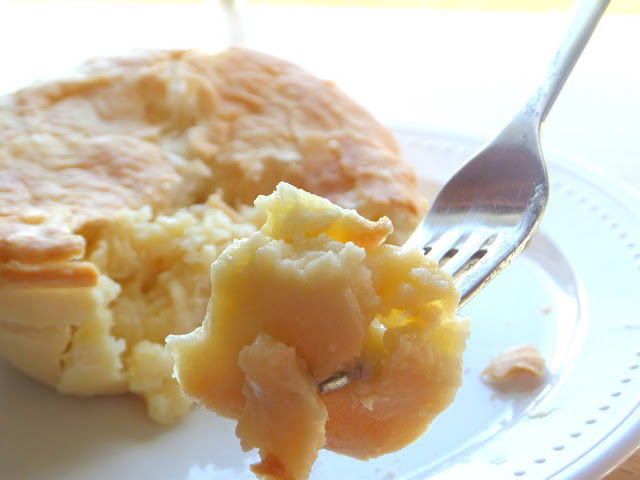
 Who says you have to make pot pies with meat and veggies?  I decided to make a mac and cheese potpie just for fun.  They turned out so good, I think I will make them more often. Sometimes I use a jumbo muffin pan to make them, other times I use ramekins like I did in these pictures.  You can use any size container you like.

Mac and Cheese Pot Pies

1 box (2 sheets) Puffed Pastry dough, thawed
1 egg whisked with 2 teaspoons water
1 16 ounce box elbow macaroni or shells
2 Tablespoons butter
3 Tablespoons all-purpose flour
1-1/2 cups whole milk
1/2 cup heavy cream
1/2 teaspoon dry mustard
1/2 teaspoon paprika
1/2 teaspoon garlic powder
1/2 teaspoon salt
Freshly ground pepper
1 cup cheddar plus ½ cup Monterrey Jack

Preheat oven to 350 degrees.  Greased your ramekins or muffin tins or whatever container you decide to use. 

If using a muffin tin:  Roll out one sheet of puffed pastry dough and cut out 5-inch circles. Press them into the greased muffin tins, using the bottom of a small glass. Set aside.


Mac and Cheese

Bring a large pot of water to a boil, cook the pasta according to package. Drain, do not rinse.

In a saucepan over medium heat, melt the butter. Stir in the flour and cook for 2 minutes. Whisk in the milk and heavy cream. Simmer for about 2 minutes, stirring constantly. Remove pan from the heat and stir in mustard, paprika, garlic powder, salt, and pepper. Add the cheese and stir until thickened and combined. In a large bowl toss the cooked pasta with the cheese sauce until combined. Set aside.


Spoon the macaroni and cheese into the prepped muffins pans inside the dough. 

Roll out the second sheet of puffed pastry dough and use a 2-1/2-inch cutter to cut out circles of dough. Place them on top of the mac n cheese. Fold up the corners to crimp and cut an ‘x’ in the center to release the steam. Brush the tops of each pie with egg wash.


Bake for 17-20 minutes until browned. Using an offset spatula, lift them out of the pan and let cool on a wire rack. Serve warm.


Photography is the property of and copyrighted to Welcome Home.
Print Friendly and PDF

Sunday, July 27, 2025

Steak Diane


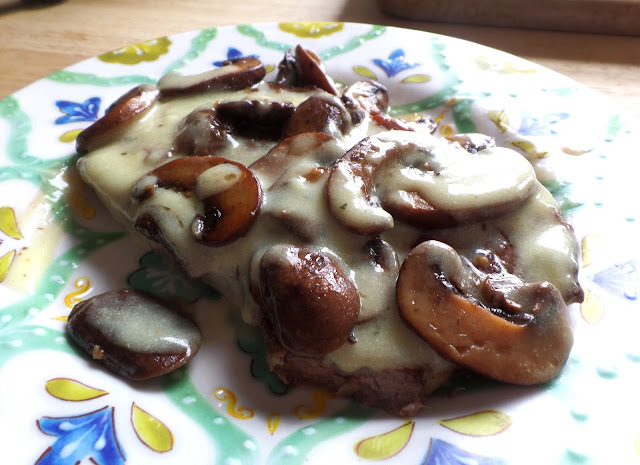
On that rare occasion when I make time to make a special dinner, I truly enjoy cooking dishes like this Steak Diane. It’s elegant, full flavored, and table-ready in less than a half hour. A sublimely-seared rib-eye or tenderloin, still retaining its juices is covered with blanket of rich creamy sauce and a sight to behold; a traditional favorite that never disappoints.

 Steak Diane

2 four ounce (4) Tenderloin steaks (or use Rib-eye)

Salt and freshly ground black pepper

2 Tablespoons Extra Virgin Olive Oil

1½ cups beef stock

2 tablespoons butter

2 teaspoons finely chopped garlic cloves

1 medium shallot, finely chopped (about ¼ cup)

2 cups sliced Baby Bella or Button Mushrooms

14 cup heavy cream

1 Tablespoon Dijon mustard

1 Tablespoon Worcestershire sauce


Season the steaks generously with salt and pepper. In a large skillet over medium-high heat, heat the oil until it shimmers, then add the steaks and cook, turning once, until evenly browned, 4–5 minutes for medium rare. Transfer to a plate to rest.


Meanwhile, return the skillet to medium-high heat and add the beef stock. Cook, stirring to de-glaze the pan, until the liquid is reduced by two-thirds, about 10 minutes. Pour the demi-glaze into a heatproof bowl and set aside.


Return the skillet to medium-high heat and add the butter. When the butter is melted and the foam begins to subside, add the garlic and shallot, and cook, stirring frequently, until soft, about 2 minutes. Add the mushrooms and cook, stirring frequently, until they soften, release their liquid, and begin to brown, about 2 minutes more.


Stir in the reserved demi-glaze along with the cream, Dijon, and Worcestershire sauce. Return the reserved steaks to the skillet, lower the heat to simmer, and cook, turning to coat, until the sauce is thickened and the meat is warmed through, about 4 minutes. 

Transfer the steaks to warmed serving plates and drizzle sauce over them.


Photography is the property of and copyrighted to Welcome Home. 
Print Friendly and PDF

Saturday, July 26, 2025

Peaches and Cream Cheese Mini Danish


How easy can it get?   Pop open some canned dough, spread a little filling and bake. Cute little breakfast danish made with peaches and cream cheese!  YUM

Peaches and Cream Cheese Mini Danish

1 can crescent rolls
1 (8ozpackage) light cream cheese, softened
1/2 cup sugar
1 egg
peach pie filling or chopped canned peaches
1 cup powdered sugar
1/2 tablespoon vanilla
2-3 tablespoon milk

Preheat oven to 350 degrees.

Beat cream cheese and sugar until smooth.  Add egg and beat until well incorporated.  Open crescent rolls and separate the triangles. 
Place about a tablespoon of the cream cheese mixture on each triangle and spread out slightly.  Put about 1 tsp of preserves on top of cream cheese.  Fold each corner into the center.  


Place danish on a baking sheet lined with parchment paper (or coated with cooking spray).  Bake in preheated oven for 12-14 minutes.  While danish is baking, prepare glaze.  


Combine powdered sugar with vanilla.  Add milk gradually, stirring with a whisk until it’s the consistency of a thin glaze.  Drizzle generously over warm danish.


Photography is the property of and copyrighted to ©Welcome Home.
Print Friendly and PDF

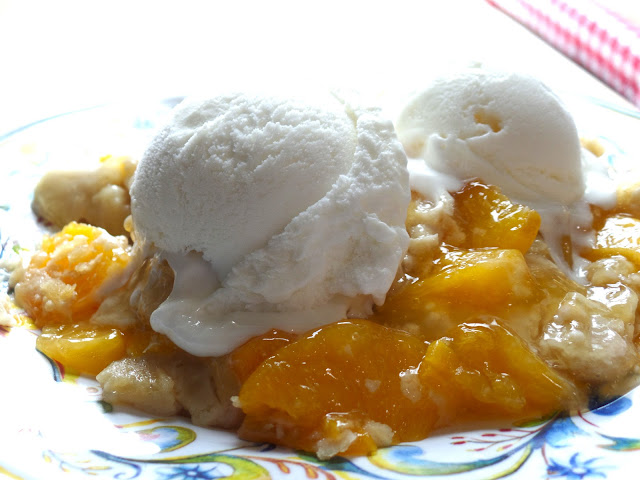
Mom's Delicious Peach Cobbler


My Mom really knew how to make those southern desserts. Those down home recipes that you knew were going to be good way before they went into the oven. I remember this peach cobbler so well. We would go to the local peach orchard and she would bring a big bushel basket full of fresh peaches for a peach pie, peach cake, homemade peach ice cream and we always looked forward to her southern peach cobbler. There was nothing better! 

 Mom's Delicious Peach Cobbler

Filling 

8 fresh peaches sliced into thin wedges (or use frozen)
1/4 cup sugar
1/4 cup brown sugar
1/4 teaspoon cinnamon
1/8 teaspoon nutmeg
1 teaspoon fresh lemon juice
2 teaspoons cornstarch


Cobbler 

1 cup all-purpose flour
1/4 cup white sugar
1/4 cup brown sugar
1 teaspoon baking powder
1/2 teaspoon salt
6 tablespoons cold butter, cut into small pieces
1/4 cup boiling water

 Topping

3 tablespoons white sugar
1 teaspoon ground cinnamon

 Preheat oven to 425 degrees. 

In a large bowl, combine peaches, 1/4 cup white sugar, 1/4 cup brown sugar, 1/4 teaspoon cinnamon, nutmeg, lemon juice, and cornstarch. Toss to coat evenly, and pour into a 2 quart baking dish. Bake in preheated oven for 10 minutes.


While the filling is baking, combine flour, both sugars, baking powder, and salt. Blend in cold butter with a fork or a pastry blender until mixture resembles coarse meal. Stir in water until just combined.


Remove peaches from oven, and drop spoonfuls of cobbler mixture over the top. Sprinkle with the sugar and cinnamon mixture. Bake until topping is golden, about 30 minutes. 

Serve with Vanilla ice cream or whipped cream.


Photography is the property of and copyrighted to ©Welcome Home.

Print Friendly and PDF