Friday, January 24, 2014

♥ Peanut Butter Bundt Cake


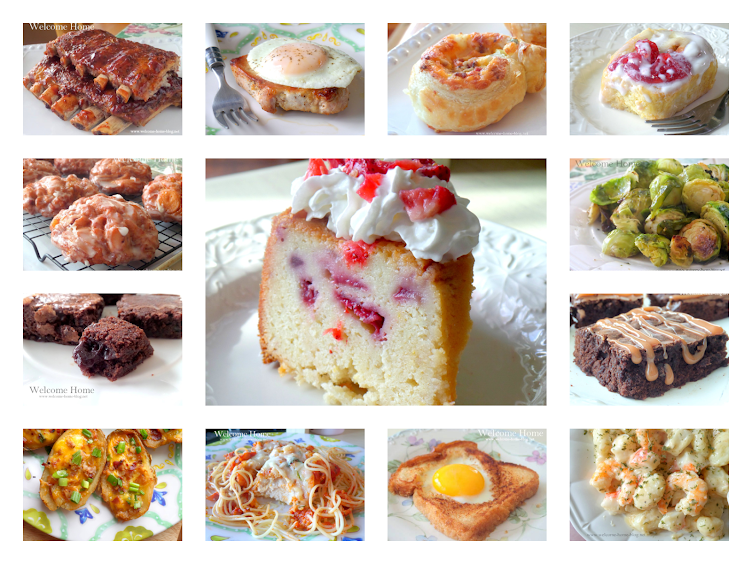
One of my many projects today was to make you my peanut butter bundt cake with vanilla glaze and peanut butter drizzle. This cake is so incredibly moist and delicious...f you like peanut butter you don't miss this one.

Peanut Butter Bunt Cake

1 cup plain yogurt
3 large eggs
2 teaspoons pure vanilla extract
2 tablespoons pure maple syrup
2 ¼ cups all-purpose flour
1 teaspoon baking powder
½ teaspoon baking soda
¼ teaspoon fine sea salt
½ cup unsalted butter, softened
1 cup smooth peanut butter
1 ¼ cup brown sugar, packed

Preheat oven to 350ºF. Grease and lightly flour your bundt pan. Using a fork or a whisk, combine the yogurt, eggs, vanilla, and maple syrup in a medium bowl. In another medium bowl, combine the flour, baking powder, baking soda, and salt with a fork or whisk. In the bowl of a mixer or a large mixing bowl, add the butter, brown sugar, and peanut butter. Using a mixer, cream for about 3 minutes on medium-high. With the mixer on low, add a third of the dry mixture to the creamed mixture, then half of the wet mixture, then another third of the dry mixture, then the last of the wet mixture, and finally the last of the dry mixture. Scrape the sides of your bowl between additions.

Turn the mixer on medium-high and beat the mixture for about 1 minute. Scrape the batter into your prepared bundt pan and bake for about 40-45 minutes or until a tooth pick comes out clean. Cool in the pan for 10 minutes, then turn out onto a wire rack to cool the rest of the way. 

Vanilla Glaze 

1 cup confectioners' sugar, sifted                                                                           

1/2 teaspoon salt
2 tablespoons butter, melted
2 tablespoons whole milk
1 teaspoon pure vanilla extract

Stir together sugar and salt in a small bowl. Whisk together butter, milk, and vanilla, and stir into sugar until mixture forms a smooth paste. Keep glaze at room temperature until ready to drizzle over cake. Before using, whisk until smooth.

Peanut Butter Drizzle

1 tablespoon peanut butter
1 tablespoon milk
1/4 cup powdered sugar

In a small bowl, mix peanut butter, 1 tablespoon milk and the powdered sugar. Drizzle over cake.

NOTE: For the cake in the photo I used a 2 small 6 cup bundt pans, which was a perfect size to share one and keep one. But you can make a full size cake using a 12 cup bundt pan. Here is the link for the 

Nordic Ware 2 Piece Non-stick Bundt Pan Set, 6 Cup & 12 Cup. It's on sale right now for only $20.50 for both pans while supplies last. Once this item is sold out, Amazon will stock it at regular price. Keep in mind whatever you purchase through Amazon through Welcome Home, you donate to the NO KILL Advocacy group to save the lives of dogs and cats who are killed unnecessarily while waiting for their forever home.
Print Friendly and PDF

♥ My Homeless Friend

"I Give Not Because I Have Much. I Give Because I Know What it's Like To Have Nothing."

 My Homeless Friend

There is a homeless man that walks along a major highway in my town. I have seen him walking that same stretch of highway for more... than 10 years now. He doesn't beg. He just walks along the road with his old torn backpack strapped to one shoulder as the other strap is broken. He is so worn and tired and so cold during the winter months, but he never begs for a thing. I sometimes pull over and hand him a few dollars for a cup of coffee or I buy him a Burger King sandwich or breakfast if I see him during that time of day. I visit him frequently and he has become my friend. Not in the sense that you might think. For you see, he has never spoken to me.

For all the years that I have been visiting him, he has never acknowledged me. He doesn't give any eye contact and he never says a word. I see him walking along that major highway, and I pull over on the shoulder just ahead of him. He continues to walk with his head down. He will not come up to the car window or even stop walking so you have to time your stop just right in order to hand him anything. He keeps his head down at all times and he never speaks.

One day, I saw him walking in front of a gas station while I was pumping gas. Afterwards, I went inside to pay and asked the gas station attendant if he knew anything about the homeless man. He said he did. I asked if he could talk or if he was just shy. His answer broke my heart. He said the man was scared. He said that many years ago he actually did talk to the man and learned just how hard his life really was. He told me that the reason he keeps his head down and will not give you any eye contact is because he lives in fear.

He said there were many times when cars pulled next to him and spit at him or threw bottles at him. He said that one time a car stopped and called him over to give him food. As he stood there, the teenagers inside threw hot scalding coffee in the mans face and then drove off laughing. He has been doused with gasoline and a lit match caught his coat on fire. Another time, he was beaten and robbed of his food and blankets. He said the man has learned to hide his basic essentials under an underpass down the road and he never carries them with him. He no longer stops or speaks to anyone. He is alone and afraid and has no one. But he has me.

I became his friend a long time ago and twice a week I make him up a homemade meal with a jug of lemonade and take it to him. I have to search for him at times but it has become my weekly ritual and just a part of my life.

Last Christmas, I wanted to give my old friend a special present. So, I stopped at the Burger King that he walks past on that same stretch of highway and I bought some gift cards that would last him a while. Then I went next door to Costco and bought a brand new super sized backpack and I filled it with juice packs and some small canned goods like Vienna sausages and Spam. I added some crackers and cookies and some snacks like beef jerky and Slim Jims. I added some hand and foot warmers and 3 pair of heavy wool socks and some warm gloves and a wool cap. I put some chap stick and a pair of sunglasses to protect his eyes. Finally, I put a daily prayer and inspirational book inside along with some magnified reading glasses just in case he needed them. I wrapped the filled backpack in a soft wool blanket and tied a warm winter scarf around it.

I set out last Christmas Eve to find him, and as I drove along the highway I felt such a sense of excitement and joy. It was so cold and windy that day and at first I couldn't find him. I thought maybe he had found shelter from the cold and I looked under the underpass and he wasn't there. But after driving up and down that same stretch of road for about an hour, there he was on the opposite side of the road. I hurried and did a quick U-turn and slowed down the car so that I wouldn't scare him. He walked towards the car staying to the far side of the shoulder, with his head down as if I wasn't there. I rolled down the window and waited as he approached the side of my car.

"Sir, I am not going to hurt you. I will never hurt you. I have seen you walk this road for a long, long time and I am ashamed that I haven't done more for you, but tonight I would like to share the spirit of Christmas and give you this gift of love." 


He reached out and took the blanket wrapped gift and just kept on walking. He didn't say a word. He never looked up. He never made eye contact. He just kept on walking with his head down. My eyes filled with tears of both joy and sadness as I sat there and watched him continue his journey from my rear view mirror. And then it happened. As he got a little farther down the road, I watched as he just stopped and fell to his knees with his hands raised in prayer to the heavens above. He lifted his new gift in the air above his head as if to give thanks and glory to God. And then he stood up, turned and looked directly back at my car, nodded his head and continued his journey.

I will leave this world knowing that I may have impacted some lives in my time here on earth, but none like this man who needed so much love on that cold and windy Christmas Eve.

So please give to those who are in need. Please don't judge them or question their motives or think twice about who they are or might be. Just give from the kindness of your heart and know that it could be you one day. And don't make excuses.  I hear so many stories about how people don't give for fear that the person isn't really homeless or that the person will just buy alcohol or drugs. Alcoholism and drug addiction is a deadly and fatal disease and I can assure you that they don't want to be in the situation they are in. They have no choice and without that fix they can have seizures and convulsions and die. But if it makes you feel uncomfortable, then don't give money. Give them food or clothing.

Please give to those who have nothing. It will make such a huge difference in your life and God will truly bless you for helping and sharing your blessings with one of his less unfortunate children.


~Marty
Print Friendly and PDF

♥ Dutch Apple Pie


I love the way my house smells right now...apples, cinnamon, nutmeg and brown sugar....yum. This is my Mom's old recipe she used when it was apple season and she wanted a change up from your typical American hot apple pie. I always loved this one. 


Dutch Apple Pie

Pie Crust (Or buy a pre-made refrigerated pie crust)

1 1/4 cups all-purpose flour
1/2 teaspoon salt
1/2 teaspoon sugar
1/2 cup (1 stick) cold unsalted butter, cut into pieces
2 to 4 tablespoons ice water

In a food processor, briefly pulse flour, salt, and sugar. Add butter; pulse until mixture resembles coarse meal, with a few pea-size pieces of butter remaining. Sprinkle with 2 tablespoons ice water. Pulse until dough is crumbly but holds together when squeezed (if necessary, add up to 2 tablespoons water, 1 tablespoon at a time). Don't over mix.

Turn dough out onto a large piece of plastic wrap. Fold plastic over dough; press to shape into a 1-inch-thick disk. Refrigerate until firm, at least 1 hour (or up to 3 days).

On a floured piece of parchment paper, roll dough to a 14-inch round with a floured rolling pin. Wrap dough around rolling pin, discarding paper; unroll over a 9-inch pie plate (opposite). Gently fit into bottom and up sides of plate (do not stretch dough).

Filling

5 1/2 cups peeled cored sliced cooking apples
1 tablespoon lemon juice
1/2 cup granulated sugar
1/4 cup brown sugar, packed
3 tablespoons flour
1/2 teaspoon ground cinnamon
1/4 teaspoon nutmeg

Topping:

3/4 cup flour
1/4 cup granulated sugar
1/4 cup brown sugar, packed
1/3 cup butter, room temperature

Preheat oven to 375 degrees. Fit pie crust into pie plate and trim off edges. In a large bowl, mix sliced apples, lemon juice, both sugars,flour, cinnamon and nutmeg. pour into crust.

Prepare topping:In a medium bowl, with a pastry blender or a fork, mix flour, both sugars, and butter until coarsely crumbled. Sprinkle evenly over apples.

Bake at 375 for 50 minutes. (If your crust gets too brown early on, cover the edges of the pie crust with tin foil and continue baking)

Photograph is the property of ©Welcome Home 2014
Print Friendly and PDF

Roast Beef Wraps


Today it's just a simple wrap for lunch. Fresh tortillas with lots of Deli style sliced Roast beef...topped with lettuce, tomato and a new mayonnaise that compliments this wrap so well!

Roast Beef Wraps
1 flour tortilla
Kraft Chipotle Flavored Mayonnaise...
lettuce
Deli style roast beef, thinly sliced
cheddar or pepper jack cheese
thin tomato slices

Heat the tortilla for ten to fifteen seconds in the microwave.
Spread the chipotle spread lightly on the tortilla. Place lettuce on top of the spread. Add the beef and cheese. Add the tomato slices. To fold the wrap, fold in the sides of the tortilla and then roll from the bottom up. Cut the wrap in half.

Photograph is copyrighted and the property of ©Welcome Home 2014.

Print Friendly and PDF

Corn Flake Meatloaf


When I was growing up I remember my Mom using Corn Flakes for a lot of different recipes. But the one I remember most was her meatloaf. Not sure what the magic of Corn Flakes is, but this is one of the best meatloaves you'll ever make. So... much more moist and lighter than using bread. Try it and let me know what you think. I love this simple recipe! Look in the comments for more photos of my dinner tonight! Yum!

 
Corn Flake Meatloaf (Also known as Amish Meatloaf)

2 pounds ground beef or chuck (80% lean)
2 1/2 cups crushed Corn Flakes (or use crushed Ritz Crackers)
1 small onion, chopped
2 eggs, beaten
1/4 cup evaporated milk
3/4 cup ketchup
1/4 cup brown sugar

Meatloaf Glaze:

1 cup ketchup
1 tablespoon brown sugar
2 tablespoons corn syrup (it makes the glaze sticky so it stays on the meatloaf, but you can leave it out if you want)

Preheat the oven to 350 degrees. In a large bowl, mix together ground beef, crushed Corn Flakes or crackers, onion, eggs, evaporate milk, 3/4 cup ketchup, and 1/4 cup brown sugar until blended.

Do not over work or pat down. You want to keep the mixture lose. Using a buttered baking dish, mound meat mixture into a loaf shape. Bake for 1 hour or until cooked through. Add the ketchup glaze half way through cooking. Let rest for about 5 minutes before slicing and serve.

Photograph is copyrighted and the property of ©Welcome Home.
Print Friendly and PDF

Thursday, January 23, 2014

♥ Chocolate Dipped Coconut cookies


I went chocolate dipping crazy today! I dipped just about everything I could find. This is one of my favorite coconut cookies and today I thought, "Why not dip that too?" Wow! A wonderful combination of flavors. Reminds you of a Mounds candy bar! 


Chocolate Dipped Coconut cookies

3 tablespoons butter at room temperature

2 1/2 cups unsweetened shredded coconut
2 large eggs at room temperature
2/3 cup sugar
1 teaspoon sea salt flakes for sprinkling

Preheat the oven to 350 degrees and line two baking sheets with parchment paper. Melt the butter in a medium saucepan. Remove from heat and add the coconut. Mix well so the coconut is well-coated with the butter. Beat the eggs with a mixer on medium speed just until blended. Add the sugar and beat on medium-high until the mixture is light-colored and fluffy. Combine the butter-covered coconut gently with the egg mixture and mix well.

Drop the batter (whatever size you'd like) onto the parchment-covered baking sheets and press down gently on the mound until it is fat. Keep about an inch of space between each cookie.

Bake for 7-10 minutes until golden. Remove from the oven and immediately sprinkle the tops of each cookie with a pinch sea salt.. Slide the entire sheet of parchment with the cookies intact onto a wire cooling rack. Once they have cooled, dip each cookie into chocolate and let them set again on parchment lined sheets.

NOTE: As soon as they are cool, put them in an air-tight container otherwise they will lose their crispness.

Chocolate Dip

1 cup semisweet chocolate chips
2 teaspoons shortening

In small microwavable bowl, microwave chocolate chips and shortening uncovered on High 1 to 1 1/2 minutes or until melted; stir until smooth. Dip half of each cooled cookie into melted chocolate. Place on parchment or waxed paper until chocolate is set.


Photograph is the property of ©Welcome Home 
Print Friendly and PDF

♥ Old Fashioned Chocolate Cake


This is the only Chocolate Cake I remember my Mom ever making. This cake was so special and we always had so much fun making it. The recipe is written on one of the hundreds of little cards that she left me when she moved to Heaven. The note on the back of this card reads.......


"My little girl, someday you may not remember making this, but I hope you do. So much love goes into making this cake and it's your brother's favorite. We always have so much fun making it for his birthday. You can hardly wait to put the candles on it and you sit by the window and wait for him to come home to surprise him. I love that about you. I hope you always have that kind and generous spirit of giving to others and that you will remember this cake was always made with so much love. ~Mom."
 
My Mom's Old Fashioned Chocolate Cake

1 3/4 cups all-purpose flour
2 cups sugar
3/4 cups good quality cocoa powder
2 teaspoons baking soda
1 teaspoon baking powder
1 teaspoon kosher salt
1 cup buttermilk
1/2 cup vegetable oil
2 extra-large eggs, at room temperature
1 teaspoon pure vanilla extract
1 cup freshly brewed hot coffee (you don't taste it)

Preheat the oven to 350 degrees. Butter 2 (8-inch) round cake pans. Line with parchment paper, then butter and flour the pans.

Sift the flour, sugar, cocoa, baking soda, baking powder, and salt into a large bowl and mix with an electric mixer on low speed until combined. In another bowl, combine the buttermilk (shake well before using), oil, eggs, and vanilla. With the mixer on low speed, slowly add the wet ingredients to the dry. Then add the coffee and stir just to combine, scraping the bottom of the bowl with a rubber spatula. You will not taste coffee in this cake. It enhances the chocolate only.

Pour the batter into the prepared pans and bake for 35 to 40 minutes, until a cake tester comes out clean. Cool in the pans for 30 minutes, then turn them out onto a cooling rack and cool completely. Place 1 layer, flat side up, on a flat plate or cake pedestal. With a knife or offset spatula, spread the top with frosting. Place the second layer on top, rounded side up, and spread the frosting evenly on the top and sides of the cake.

Chocolate Butter Cream Frosting

6 ounces good quality semisweet chocolate
1/2 pound (2 sticks) unsalted butter, at room temperature
1 extra-large egg yolk, at room temperature
1 teaspoon pure vanilla extract
1 1/4 cups sifted confectioners' sugar
1 tablespoon instant coffee powder (optional but good!)

Chop the chocolate and place it in a heat-proof bowl set over a pan of simmering water. Stir until just melted and set aside until cooled to room temperature. Add butter to a large bowl and with an electric mixer on medium-high beat the butter until light yellow and fluffy, about 3 minutes. Add the egg yolk and vanilla and continue beating for 3 more minutes.

Turn the mixer to low, gradually add the confectioners' sugar, then beat at medium speed, scraping down the bowl as necessary, until smooth and creamy. Dissolve the coffee powder in 2 teaspoons of the hottest tap water. On low speed, add the chocolate and coffee to the butter mixture and mix until blended. Don't whip! Spread immediately on the cooled cake.


Photograph is copyrighted and the property of ©Welcome Home 2014.
Print Friendly and PDF

♥ Seafood Lasagna


I make regular lasagna a lot but for a real change up I sometimes put together a seafood lasagna that is delicious. Especially when I can find Halibut or crab meat on sale. I usually go with the fresh lump crab meat but any seafood you choose is just as good in this recipe. 


Seafood Lasagna

1 lb fresh halibut (or you can use Fresh lump crabmeat)
4 Tablespoons of Butter
4 Cloves of Garlic (chopped)
1/4 Cup chicken stock)
1 Tablespoon of Lemon Juice
4 Tablespoons of Flour
2 cups of heavy cream or half and half
2 Cups of Parmesan Cheese (grated)
2 Cups of Mozzarella (grated)
16 oz. Ricotta Cheese
1 cup sliced mushrooms
1 egg
1 box Lasagna Noodles, cooked and drained
2 Teaspoons salt (to taste)
1 Teaspoon of Pepper (to taste)

Saute garlic in butter or olive oil until tender. Add mushrooms and saute until tender. Add the halibut and sauté until cooked. When done, flake the halibut into pieces. If using crabmeat, just saute lightly to warm being careful not to burn. Remove the seafood to a plate and set it aside.

In same skillet add chicken stock and lemon stir up any remaining bits on bottom of skillet. Simmer to reduce liquid by half. Then return the seafood back to the skillet and coat in liquid. Remove pan and set aside.

In another large skillet or saucepan melt butter and large sauce pan melt 4 Tablespoons of butter. Stir in flour and to cook for at least two minutes until flour cooks. Whisk in the cream and continue whisking to get rid of any lumps. Allow the sauce to thicken stirring frequently. Then add the Parmesan cheese and season to taste.

In separate bowl mix the the ricotta, spinach, egg, 1/2 cup of Parmesan cheese, 1 cup of mozzarella and a cup of the white sauce. Pour 1 Cup of the white sauce into the bottom of a 9 by 13 baking dish. Cover the sauce with a layer of cooked noodles in the baking dish.

Next pour half of the cheese/spinach mixture over the noodle layer. Then cover with a layer of noodles. Layer in all of your seafood from the pan, pour 1 cup of the white sauce over the seafood. Place a layer of noodles over this seafood layer. Add a layer of the remaining cheese/spinach mixture. Add a final layer of noodles on top.

Pour the remaining white sauce over the noodles. Top with 1/2 cup of Mozzarella and 1/2 cup of Parmesan sprinkled as the final topping layer. Bake in a preheated 350 degree oven until bubbling on the sides and 

golden brown on top, about 45-60 minutes.


Photography is copyrighted and the sole property of ©Welcome Home.
Print Friendly and PDF

Wednesday, January 22, 2014

♥ Green Beans and Ham


When I was little I can remember my Mom taking me out to the garden to pick fresh green beans. I thought it was so much fun carrying my little basket and walking behind her and watching her every move. Then we would sit out of the back porch and with two big bowls in our laps, we would snap them and I just loved that sound. What she created for supper that night with those green beans has never left my memory. She used to say, "we're gonna have a big ol' mess of beans and cornbread tonight." Oh what a supper!

Southern Green Beans and Ham

2 tablespoons butter
1 onion, diced or chopped
3 cloves garlic, minced
 3 or 4 ham hocks, ham end pieces or ham shanks
2 to 3 pounds of fresh green beans, cleaned and snapped
3 cans chicken broth
3 cans water (use a broth can to measure)
1 tablespoon sugar
Kosher salt and pepper to taste

Place ham hocks or shanks in water enough to cover & let simmer a good 2 hours. Remove ham & set aside to cool. Reserve broth. When cool enough to handle, cut into chunks.

In a large heavy stock pot, melt butter on medium high. Add onions and garlic and ham. Cook until onions and garlic are tender and meat has browned a bit.

Turn down the heat to medium and add green beans, chicken broth and 3 cans full of the broth from the cooked ham hocks. Just cover the beans with the liquid. If you need a bit more water, add it. Cover and cook beans for about an hour. Add, sugar, salt and pepper and stir well.

NOTE: You can also add some potatoes to your beans. Just peel and dice 8 potatoes and add to your beans at this point. Cover and cook for another 25 to 35 minutes, or until the potatoes are fork tender. Remove lid for the last 10 minutes of cook time. Check and re-season if necessary.

Photograph is copyrighted and the property of ©Welcome Home 2014.
Print Friendly and PDF

Tuesday, January 21, 2014

Apple Pie Roll Ups


Apple Pie Roll Ups

1/2 cup sugar
2 teaspoons ground cinnamon
1/4 teaspoon freshly ground nutmeg
1 package refrigerated pie crust
3 tablespoons melted butter
2 medium tart apples (Granny Smith), peeled and cut into 6 wedges each

Preheat the oven to 350 degrees. Line a large baking sheet with parchment paper and set aside. Whisk together the sugar, cinnamon and nutmeg in a small bowl. Set aside.

Unroll the pastry onto a lightly floured surface. Brush with 2 tablespoons of the melted butter. Sprinkle with all but 1 tablespoons of the cinnamon sugar. (reserve for a few minutes) Cut the sheet into 12 inch strips along the long side. Lay a wedge of apple on the short end of each pastry strip and roll them up, with the sugared side of the pastry against the apple. Place them onto the lined baking sheet. Brush with the remaining melted butter and sprinkle the remaining cinnamon sugar evenly over top.

Bake for 13 to 15 minutes until the pastry is golden brown. Serve warm, with or without custard. Delicious!


Custard                                                 

8 egg yolks
1/3 cup sugar
1 1/4 cup of whole milk
1 1/4 cup of heavy cream
1 vanilla bean, split

Beat the egg yolks and sugar together in a bowl until well blended. Place the milk and cream in a saucepan with the vanilla. Scrape the insides of the vanilla bean into the mixture before you add it. Bring the mixture just to the boil.

Pour a little bit of this mixture into the eggs to temper them, and beat it together well. Pour this back into the pan and whisk together. Return to the heat and using a whisk, lightly stir until it begins to thicken. DO NOT BOIL.

As the egg yolks warm, the cream will get thicker and create a custard. Keep stirring until it coats the back of a wooden spoon. Remove from the heat and pass through a fine sieve. Leave to cool a bit before using. Serve warm or allow to cool completely, stirring occasionally.

NOTE: Be sure not to let the mixture boil once the eggs are added, or you will end up with a curdled mess. You only need to heat it up enough to cook the eggs. The custard is ready when it coats the back of a wooden spoon.

Marie's blog: http://theenglishkitchen.blogspot.com/2011/10/apple-pie-roll-ups.html

Print Friendly and PDF

Cheesy Bacon Fries


I know...I am shameless! But a girl gotta eat! In moderation of course!

Cheesy Bacon Fries

1 (32 ounce) package frozen french fries
1 cup cheddar cheese, shredded...
1/2 cup green onion, sliced
1/4 cup bacon, cooked and crumbled
ranch salad dressing

Bake the frozen fries as directed on package. Although sometimes I do deep fry them to get them even more crispy! Then place fries on a broiler-proof dish or platter. Sprinkle with cheese and bacon. Broil for 1-2 minutes or until cheese is melted. Serve with ranch dressing.

Photograph is copyrighted and the property of ©Welcome Home
Print Friendly and PDF

Spinach-Feta-Bacon Torte

I whipped this together for lunch today and it turned out really good. A soft pastry dough filled with spinach and bacon and feta cheese with just a hint of sun dried tomatoes.

Spinach-Feta-Bacon Torte
1 tablespoon olive oil ...
2 cups frozen spinach, thawed and water squeezed out
1 small onion, minced
1/4 cup canned sliced mushrooms
1 teaspoon grated orange zest
1/4 cup cooked bacon, chopped
1/4 cup sun dried tomatoes in oil, chopped
Pinch red pepper flakes
black pepper to taste
3 eggs
1 cup Greek style yogurt
1 cup crumbled feta cheese (about 4 ounces)
1/2 cup grated Reggiano or Parmesan cheese
1 cup fresh breadcrumbs

Preheat the oven to 400 degrees. Heat a heavy, large skillet over a medium flame, then add the olive oil. When the oil shimmers, add the onion and turn down the heat so the onion sweats but doesn't brown.

Meanwhile, put the spinach in a bowl and add onion and the orange zest along with the red pepper flakes and the pepper. Cook over low heat for a minute or two. Remove from the heat and put the spinach mixture into a large bowl to cool. When the spinach is room temperature, whisk in the eggs, then the yogurt, the bacon, mushrooms, cheese, tomatoes, and bread crumbs. Set aside while you make your torte shell.

Torte Shell

2 3/4 cups flour
1 teaspoon salt
1/2 cup butter plus 2 tablespoons butter, cut in small pieces
2 eggs
1/3 cup milk

Line the bottom of a 9 inch round cake pan with parchment paper. Spray the bottom and sides of the pan. Preheat the oven to 350 degrees.

Place the flour and salt in a food processer or mixer bowl and briefly combine. Pulse in the butter pieces until crumbly. Add the eggs and milk and blend until dough forms. Remove about 2/3 of pastry dough and shape into a ball and flatten into a circle. Repeat with the remainder of the pastry.

Roll the larger amount of pastry into a 14 inch round and place in the prepared pan leaving an equal amount of overhang around the edges. Fit into the corners of the pan by pulling the dough on the side toward the center and laying it into the bottom and edge of the pan. Continue all the way around.

Pour the spinach mixture into the lined pie plate and then pull the corners up so they lie on top of the mixture. Put the tart in the oven and bake for about 30-40 minutes turning once so that it cooks evenly. The torte is done when the pastry is golden brown and the center of the spinach mixture has puffed up and is set.

Allow the torte to rest for 10 minutes or so before cutting it as the filing will be piping hot. It is also good served at room temperature or cold. The tart serves 6-8 as a main dish, or it can be sliced thin for appetizers.

*** Photograph is copyrighted and the property of ©Welcome Home.
Print Friendly and PDF

Friday, January 17, 2014

Cherry Mini Cakes

Cherry Mini Cakes

1 box Betty Crocker® SuperMoist® white cake mix plus the
water, vegetable oil and egg whites called for on cake mix box

1 package (0.13 oz) cherry-flavored unsweetened Kool-Aid
1 teaspoon almond extract
1 bag (2 lb) powdered sugar (8 cups)
1/2 cup water
1/2 cup corn syrup
2 teaspoons almond extract
2 to 3 teaspoons hot water
Miniature red candy hearts

Heat oven to 350. Grease bottoms only of about 58 mini muffin cups. In large bowl, beat mini cakes ingredients with electric mixer on low speed 30 seconds, then on medium speed 2 minutes, scraping bowl occasionally.

Divide batter evenly among muffin cups (about half full). (If using one pan, refrigerate batter while baking other cakes; wash pan before filling with additional batter.) Bake 10 to 13 minutes or until toothpick inserted in center comes out clean. Cool 5 minutes. Remove cakes from muffin cups to cooling rack. Cool completely, about 30 minutes.

Place cooling rack on cookie sheet or waxed paper to catch glaze drips. In 3-quart saucepan, mix all glaze ingredients except hot water. Heat over low heat, stirring frequently, until sugar is dissolved. Remove from heat. Stir in 2 teaspoons hot water. If necessary, stir in up to 1 teaspoon more water so glaze will just coat cakes.

Turn each cake so top side is down on cooling rack. Pour about 1 tablespoon glaze over each cake, letting glaze coat sides. Let stand until glaze is set, about 15 minutes. Top each cake with candy hearts. Store loosely covered.

Properly linked to: http://www.bettycrocker.com/recipes/cherry-mini-cakes/81125efc-7c82-4b40-a69b-cb9f27cea7ca
Print Friendly and PDF

Chocolate Peppermint mini cupcakes


Chocolate Peppermint mini cupcakes

1 pouch Betty Crocker® chocolate chunk cookie mix
3 tablespoons vegetable oil
1 tablespoon water
1 egg
1/2 teaspoon peppermint extract
2 1/2 cups powdered sugar
1/4 cup crushed peppermint candies (about 14)
3 tablespoons butter or margarine, softened
3 to 4 tablespoons milk
2 to 3 drops red food color
Powdered sugar

Lightly spray 24 mini muffin cups with cooking spray. Prepare cookie dough as directed on package except--use 3 tablespoons oil, 1 tablespoon water, 1 egg and the peppermint extract. Shape dough into 24(1-inch) balls; place in muffin cups.

Bake at 375° F for 8 to 10 minutes or until set. Immediately make indentation in center of each cookie with end of wooden spoon to form a cup. Cool 30 minutes. Remove from pan; cool completely.

In medium bowl, beat powdered sugar, crushed peppermint candies, butter, milk, and red food color with electric mixer on medium speed until smooth and creamy. Spoon frosting into decorating bag with large star tip (#5). Pipe into each cookie cup. Sprinkle with powdered sugar. Store in refrigerator.

http://www.bettycrocker.com/recipes/chocolate-peppermint-tarts/0a935cab-3126-42a7-b3a8-84f12254e83d
See More
Print Friendly and PDF

Vanilla Cupcakes With Caramel Buttercream Frosting


How could a simple little cupcake be soooo good? These are just delicious with a touch of salt in the caramel frosting. One of my favorite cupckakes. If you love caramel you will love this one!

Vanilla Cupcakes With Caramel Buttercream Frosting

Vanilla Cupcakes:

1½ cups all-purpose flour
1 cup granulated sugar
1½ teaspoons baking powder
½ teaspoon table salt
8 tablespoons unsalted butter (1 stick), room temperature
½ cup sour cream
1 large egg , room temperature
2 large egg yolks , room temperature
1½ teaspoons vanilla extract

Adjust oven rack to middle position; heat oven to 350 degrees F. Line standard muffin/cupcake tin with paper or foil liners.

Whisk together flour, sugar, baking powder, and salt in bowl of standing mixer fitted with paddle attachment. Add butter, sour cream, egg and egg yolks, and vanilla; beat at medium speed until smooth and satiny, about 30 seconds. Scrape down sides of bowl with rubber spatula and mix by hand until smooth and no flour pockets remain.

Divide batter evenly among cups of prepared tin. Bake until cupcake tops are pale gold and toothpick or skewer inserted into center comes out clean, 20 to 24 minutes. Remove the cupcakes from tin and transfer to wire rack; cool cupcakes to room temperature before frosting.

Caramel Buttercream Frosting

1/4 cup sugar
2 Tbsp. water
1/4 cup heavy cream
1 tsp. vanilla
3/4 cup (1.5 sticks) salted butter, softened
2 cups powdered sugar

Briefly stir together granulated sugar and water in a small saucepan and bring to a boil over medium-high heat. Continue cooking, without stirring, until mixture turns dark amber in color, about 6 to 7 minutes.

Remove from heat and slowly add in about a tablespoon or two at a time of the cream and vanilla and carefully stir until smooth. Set aside until cool to the touch, about 25 minutes.

Beat the butter on medium-high speed until light in color and fluffy, about 3 minutes. Reduce to low speed and add the powdered sugar, and mix until completely blended. Turn off the mixer, and add caramel. Then turn the mixer back on and combine the caramel then increase speed to medium-high and beat until light and airy.

I decorated with melted Kraft caramels and added a chocolate malt ball candy on top of each one.

Photograph is copyrighted and the property of ©Welcome Home
Print Friendly and PDF

Wednesday, January 15, 2014

♥ Custard Buttons


Delicious and buttery with a luscious custard cream center. Fabulous!

Custard Buttons 


1 1/4 cups flour
3 tablespoons cornstarch
1 teaspoon pure vanilla
1 teaspoon baking powder
4 1/2 tablespoons unsalted butter, cut into bits
4 1/2 tablespoons Crisco, cut into bits


3 tablespoons powdered sugar, sifted
1 large egg

For the filling:

4 tablespoons unsalted butter
1 tablespoon cornstarch
1/2 teaspoon pure vanilla (or more if needed)
1 cup powdered sugar, sifted
few drops of hot water if necessary

Preheat the oven to 350 degrees. Line two baking sheets with baking parchment and set aside.

Whisk the flour, cornstarch, baking powder and sugar together in a bowl. Drop in the butter and Crisco and cut into the flour using a pastry blender or two knives until you have something the consistency of sand. Beat the egg and vanilla lightly and then stir into the dry mixture, mixing it in well.

Scoop out Tablespoon size pieces of the dough and shape lightly into balls between the palms of your hands. Place about 2 inches apart on the baking sheets. Press down with a fork which you have dusted in flour each time. Bake for 12 to 14 minutes, until well risen and set, but not browned. Transfer to a wire rack to cool while you make the filling.

Filling:

Cream the butter and vanilla, cornstarch and sugar together in a large bowl until light and fluffy. Be patient, it will come together eventually. If the mixture still seems a bit stiff, add a few drops of hot water and beat until you have the consistency you want.

Sandwich two cookies together with the custard filling and set aside to enjoy later!

http://theenglishkitchen.blogspot.com/2010/05/custard-buttons.html
Print Friendly and PDF

Who Am I?

While praying one day, a young woman stopped and asked this question, "God, who are you." And God replied, "I am."

"But I don't understand, she said. "Who is, I am?"

And he replied, " I am love, I am peace, I am joy. I am forgiveness, ...I am compassion and I am patient. I am hope and I am benevolent. I am omnipotent, I am omniscient and I am the almighty. I am strength and I am safety. I am the creator. I am the Alpha and Omega. I am the beginning and the end. I am the most high. I am the way, the truth and the light. I am the answer.

The woman listened and with tears in her eyes she looked toward the heavens and said, "Now I understand who you are God, but then who am I?"

And God tenderly wiped away her tears and whispered, "You are mine."
Print Friendly and PDF

Orange Roasted Chicken


One of the many recipes I made over the weekend and one of my favorites.  I use Orange marmalade or Apricot Preserves. This is a keeper my friends....you'll love the flavors. See more photos in the comment section under this post. Be sure and click on the photos for drool mode!

 Orange Roasted Chicken

1 chicken cut up (With the bones and skin. You can use breast, thighs or legs or the whole chicken)
2 cups orange marmalade or apricot preserves
1 cup chicken broth
2 tablespoons low sodium soy sauce
1 tablespoon orange zest
pinch or two of red pepper flakes (or more if you want it spicier)
1-2 teaspoons of liquid smoke (more if you like that smokey grilled chicken flavor).

Arrange your chicken in a deep dish. Mix preserves, soy sauce, orange zest, pepper flakes and liquid smoke in a saucepan over low heat and cook until preserves have melted down. Pour only half of the sauce over the chicken and set the remaining sauce aside. Cover chicken and place in the refrigerator for an hour.               

Preheat oven to 400 degrees. Add 1 tablespoon of cornstarch to the remaining sauce and stir over medium heat until warm and thicker than original sauce. Remove chicken from the refrigerator and place on raised rack inside baking or roasting pan. Pour 1 cup of chicken broth under rack. Brush the thickened warmed sauce on top of the chicken and cover entire pan or dish with aluminum foil to keep the steam inside the pan while roasting. Make sure chicken is not laying in the broth.

Bake for 40 minutes and then remove from oven. Remove foil and generously brush more sauce all over chicken. Turn heat down to 350 degrees and bake another 10-15 minutes uncovered. Baste once more until chicken is done. Remove from oven and allow to rest for 10 minutes before serving. Serve any additional sauce on the side.


Photographs are copyrighted and the property of ©Welcome Home.


Print Friendly and PDF