Monday, October 13, 2014

Coconut Cookies


One of my favorite cookies! Soft and chewy with just enough coconut to make them wonderful! These are so good just out of the oven with a cold glass of milk!  Your friends and family will love these! 

Coconut Cookies

1 1/4 cups all-purpose flour
1/2 teaspoon baking soda
1/4 teaspoon salt
1/2 cup butter
1/2 cup packed brown sugar
1/2 cup white sugar
1 egg
1/2 teaspoon vanilla extract
1 1/3 cups flaked coconut

Preheat oven to 350 degrees. Combine the flour, baking soda, and salt; set aside.

In a medium bowl, cream the butter, brown sugar, and white sugar until smooth. Beat in the egg and vanilla until light and fluffy. Gradually blend in the flour mixture, then mix in the coconut. Drop dough by teaspoonfuls onto an parchment lined cookie sheet. Cookies should be about 3 inches apart.

Bake for 8 to 10 minutes in the preheated oven, or until lightly toasted. Cool on wire racks


Photograph is the property of and copyrighted to ©Welcome Home

Print Friendly and PDF

Pecan Toffee Bars with Ganache

These are decadent and delightful and a big hit around here with my friends and family. Rich and wonderful and easy to make!  This is a keeper my friends.

Pecan Toffee Bars with Ganache 

Non stick spray
1 pound refrigerated Pillsbury sugar cookie dough
2 (1.4-ounces) chocolate-toffee candy bars, coarsely chopped, ( I use Skor Candy bars)
1/2 teaspoon pure vanilla extract
1 cup Ghirardelli semisweet chocolate chips
1 teaspoon vegetable oil
1 cup (8 ounces) mascarpone cheese, room temperature
1/4 cup toasted pecans
2 (14-ounce) cans sweetened condensed milk
2 tablespoons butter

Position an oven rack in the middle of the oven. Preheat the oven to 350 degrees. Spray a 7 by 10 3/4-inch nonstick baking pan with vegetable cooking spray. Lay a 6 by 18-inch piece of parchment paper in the pan, allowing the excess paper to overhang the sides. Spray the parchment paper lightly with cooking spray.

In a medium bowl, combine the cookie dough, 1/2 of the chopped chocolate-toffee candy pieces and vanilla extract. Using damp fingers, gently press the dough into the prepared pan. Using the tines of a fork, prick the dough all over. Bake for 12 to 14 minutes until the crust is lightly browned. Cool for 15 minutes.

Meanwhile, in a heavy-bottomed saucepan over medium-low heat, melt butter and then pour in condensed milk. Slowly bring the mixture to a boil, stirring continuously. Continue stirring over the heat until mixture becomes thick and a light brown caramel color, about 15 minutes. Pour the caramel over the cooked shortbread and spread evenly using a rubber spatula. Sprinkle top of caramel with chopped, toasted pecans and chopped toffee bar. Set aside to cool.

Place the chocolate chips and vegetable oil in a medium bowl. Place the bowl over a pan of simmering water and stir until the chocolate has melted. Cool the chocolate mixture for 10 minutes. Whisk in the mascarpone cheese until the mixture is smooth. Using a spatula, spread the a thick layer of the chocolate mixture over the cooled crust. Refrigerate for at least 2 hours until the chocolate layer is firm. Peel off the parchment paper and cut into 1 1/2 by 2-inch bars. Serve at room temperature.

Note: To toast pecans, arrange in a single layer on a baking sheet. Bake in a preheated 350 degrees oven for 8 to 10 minutes until lightly browned.
Print Friendly and PDF

Friday, October 10, 2014

Pan seared Rockfish (AKA Striped Bass)


When you think of Maryland and food, the first thing that comes to mind is usually seafood because of all our treasures from the Chesapeake Bay. Usually the first thing that comes to mind is our incredible Maryland Crab cakes!  We are known all over the world for our crab cakes! 

But there is another treasure of the Bay and the top recreational sport fish in the bay.  The Rockfish, also known as Striped Bass or "Striper" as we call it, is the official fish of the State of Maryland.  It is an amazing fish that is so buttery and so delicious and so popular here that at one time it was so "overfished" that they had to put a moratorium on it here in Maryland to replenish the Bay with this wonderful fish. It was a sad time for the people here in Maryland to wait the 5 years until the controls were lifted.  


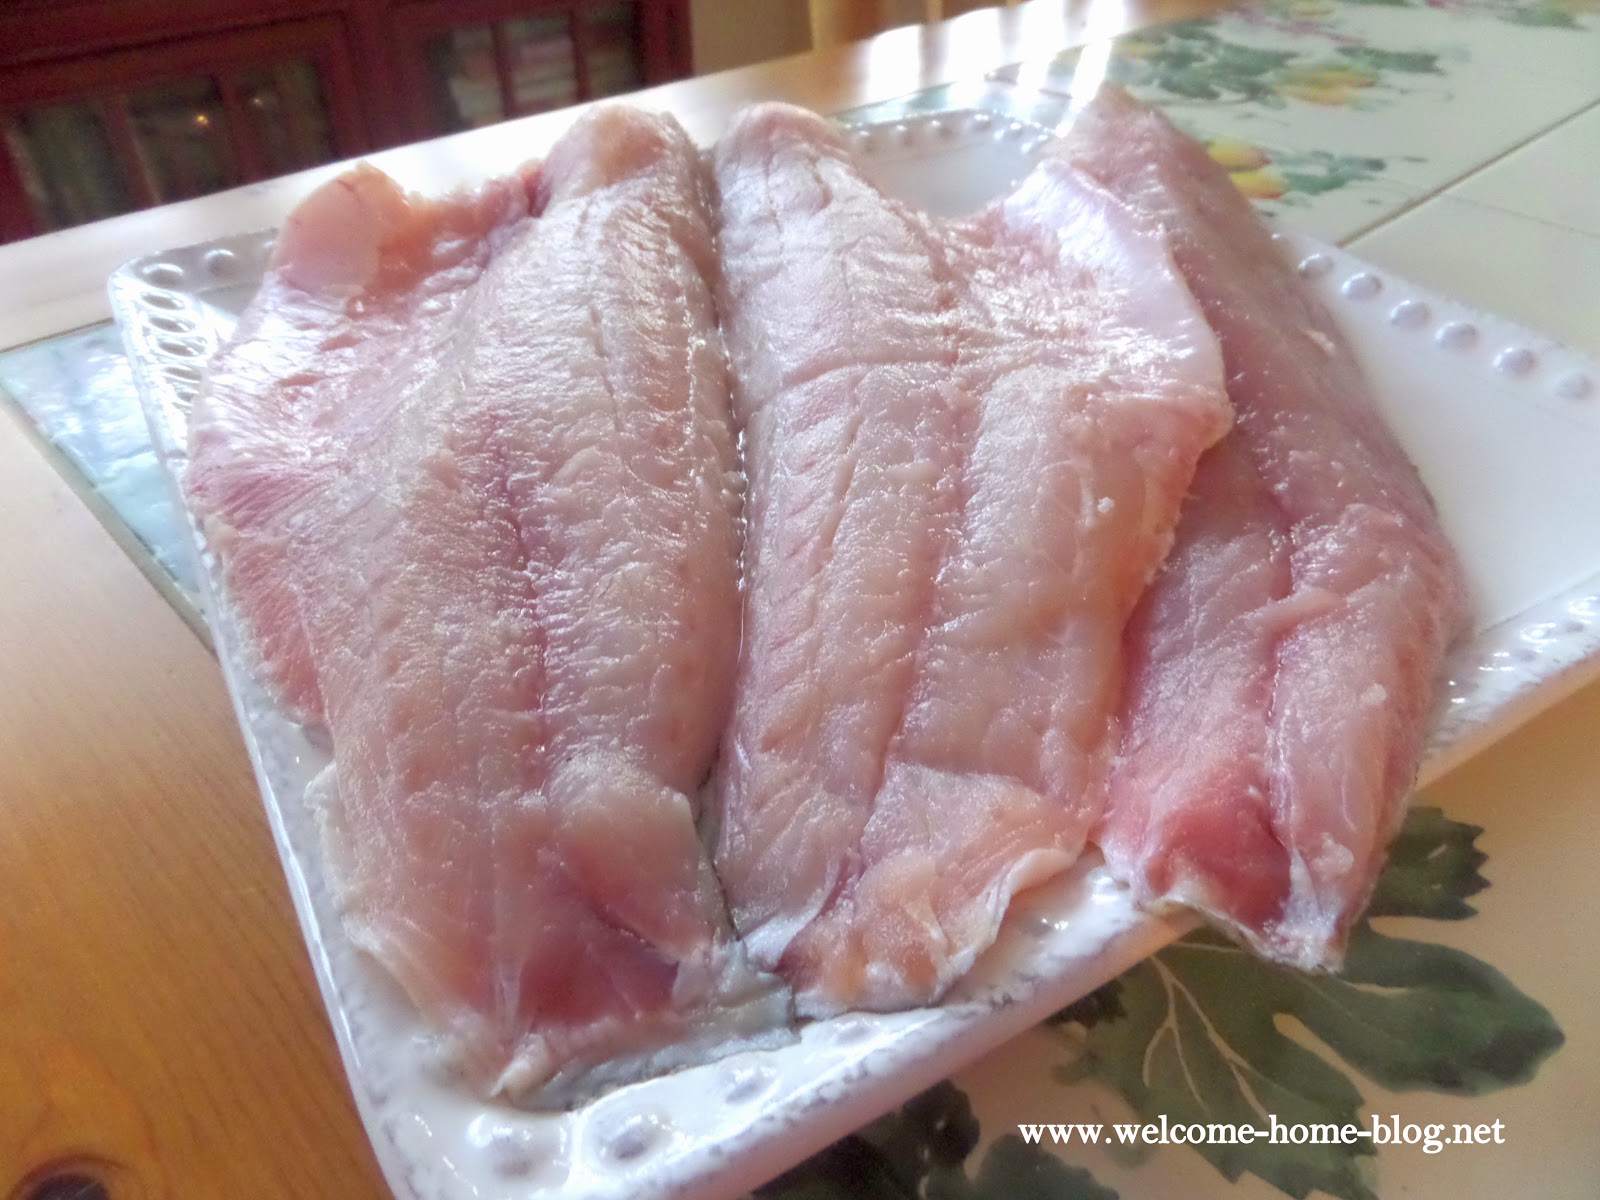
Rockfish is a fish everyone should try.  It is a hearty white fish is similar to halibut in taste and texture, with a little hint of swordfish flavor. Because of the durability of this fish, any cooking method will be good from frying to grilling. 

The most important part about preparing  this fresh fish is to keep it simple. In this recipe,  rockfish fillets are seasoned with nothing more than salt, black pepper and Old Bay seasoning. You want to retain their delicate texture and innate moistness with a quick, high-heat sizzling in a skillet to keep the meat nice and juicy.The fillets are  seared in a hot pan until crisp on the outside and tender and flaky on the inside. Rockfish is a local delicacy that everyone should try. 

Pan seared Rockfish (AKA Striped Bass)

4 center cut rockfish fillets; about 2 ½ inches thick
2 tablespoons olive Oil
2 tablespoons butter
3 tbsp Old Bay Seasoning
Salt and Pepper to taste

In a small bowl, combine the salt, pepper and Old Bay. Remove any noticeable pin bones from fish if you come across any.  Then dredge your fillet and shake off excess.  Melt your butter and olive oil in a large heavy skillet; set to medium-high heat. Once the oil begins to ripple, not smokey, carefully add the fillets.  Sear the fillets on the first side without touching them for about 3-4 minutes. You want to leave it alone so that a crust can form to hold the fillet together when you flip it to the other side.  Cook the fillets with the skin on to ensure that they don't fall apart in the pan. Fry the skin-on side first, then flip the fillets and cook the skinless side.  Next, carefully flip and sear on the other side for an additional 3-4 minutes. The fish is cooked when it is opaque in the center and flakes nicely.  Serve with a squeeze of fresh lemon juice if desired.


Photographs are the property of and copyrighted to ©Welcome Home.

Print Friendly and PDF

Fried Egg Sandwich

Blogging is always full of surprises. I can make a recipe that takes over an hour to prep and cook and then to capture the essence of the dish I can spend another hour photographing it. 

A blogger never knows how it will be received or what to expect, which makes this work always interesting. For example, this past Saturday, while in my usual hurry to run out the door to do some errands, I threw an egg in a pan and fried it. Then I slapped it on two pieces of toast and took one single picture of it and posted it. I asked a question that brought in nearly 400 comments!

So I will pose the same question on it again my friends...."Would you eat this with a knife and fork or would you pick it up and let it run down your arms? How do you eat your fried egg sandwich?" 

And for those of you who do not like a runny yolk...oh you don't know what you're missing! 

Fried Egg Sandwich

1 large egg
1 tablespoon butter
bread of your choice

Heat butter in skillet on medium heat. Crack egg in the skillet and cook on one side until white is set. Flip over and cook on other side just until set and then serve on buttered toast. Oh yum...I could eat these any time of the day or night!

Photograph is copyrighted and the property of ©Welcome Home.
Print Friendly and PDF

Potato Latkes


Latkes are a traditional Jewish pancake made with shredded potatoes and eggs. One recommended way to serve latkes is to top them with applesauce.


Potato Latkes

1 package Shredded Hash Browns
2 eggs
1/3 cup all purpose flour
1/4 cup finely chopped green onion
1/4 teaspoon black pepper
1 teaspoon salt
1/4 teaspoon baking powder

In large bowl stir together Potatoes, eggs, flour, green onion, pepper, salt, and baking powder. Heat 1 tablespoon oil in a 12-inch nonstick skillet over medium heat. 

Cook 4 latkes at a time: spread 1/4 cup potato mixture for each latke into 3 1/2-inch circles in skillet. Cook 4 to 5 minutes, turning once. Repeat with remaining potato mixture and add oil to skillet as needed. Season with salt and pepper if desired. 

Recipe adapted from 
Print Friendly and PDF

Thursday, October 09, 2014

Baked Cheddar Eggs & Potatoes

I love eggs any time of day or night!  I love this simple recipe! 

Baked Cheddar Eggs & Potatoes 

3 tablespoons butter
1-1/2 pounds red potatoes, chopped

1/4 cup minced fresh parsley
2 garlic cloves, minced
3/4 teaspoon kosher salt
1/8 teaspoon pepper
8 eggs
1/2 cup shredded extra-sharp cheddar cheese

Preheat oven to 400°. In a 10-in. ovenproof skillet, heat butter over medium-high heat. Add potatoes; cook and stir until golden brown and tender. Stir in parsley, garlic, salt and pepper. With back of a spoon, make four wells in the potato mixture; break two eggs into each well.

Bake 9-11 minutes or until egg whites are completely set and yolks begin to thicken but are not hard. Sprinkle with cheese; bake 1 minute or until cheese is melted.


http://www.tasteofhome.com/recipes/baked-cheddar-eggs---potatoes
Print Friendly and PDF

Chicken Croquettes


These were big in the 50's and 60's and my Mom made them often. They were so good and I loved it when we had them for dinner. Crispy on the outside and filled with a creamy, tender chicken breast filling. I've been making them ever since and I haven't changed a thing. They are still as good as I remember them. Did your Mom make these when you were growing up?   


Chicken Croquettes

2 cups cooked chicken, diced small (I use a pre-cooked store bought rotisserie chicken)

2 teaspoons minced dried onion
1 tablespoon of chopped celery, diced very small
1/4 cup butter
1/4 cup all-purpose flour
1 cup half and half or cream
1 egg, beaten
2 tablespoons olive oil
About 30 Ritz or Club buttery crackers
2 Tablespoons all-purpose flour
2 teaspoons poultry seasoning
salt and pepper to taste

 Place chicken in bowl with minced onion and add a generous amount of salt and pepper to taste. Stir and set aside.

Place butter in a large non-stick skillet and melt over medium-high heat, stirring frequently. Whisk 1/4 cup flour into melted butter and cook 1 minute. Add half and half or cream to skillet, whisking constantly, to blend in the butter/flour mixture. Bring mixture to a boil, stirring constantly so that it doesn't burn on the bottom. Continue to stir until sauce has thickened. Remove skillet from heat and stir in diced chicken and minced onion and celery and mix until well combined. Place mixture in a covered container and refrigerate 4-6 hours, or overnight.


Place crackers in a zip-lock bag and seal (pressing out all air). Using flat side of a meat mallet, crush crackers finely and pour in bowl. Add flour, poultry seasoning, and salt and pepper to taste and mix well. Set bowl aside. In a small bowl, whisk 2 tablespoons water with egg. Set aside. Now form your croquettes. 

Using your hands take about two tablespoons of the chilled chicken mixture and roll between hand, forming 8-10 equal sized croquettes. Set aside. You can make them any shape you want. I usually do round because it's just easier. Dip each croquette into egg wash one at a time and then roll in the cracker crumbs to coat very well. Once you have coated them the first time, dip them again in the egg wash and coat them a second time. Set them aside.


In a large non-stick skillet heat 2 tablespoons of olive oil over medium-high heat. Place croquettes in hot skillet and brown on all sides, carefully turning with tongs. Cook in batches if necessary. Do not crowd them or they will not brown and will be difficult to turn. 

Preheat oven to 350 degrees and line a baking sheet with parchment paper or spray with non-stick spray. Bake uncovered for about 30 minutes until heated through. Sprinkle on a little Parmesan and parsley for garnish...or serve with creamy chicken gravy...see recipe below.

Creamy Chicken Gravy

1 (14 ounce) can cream of chicken soup
2 tablespoons sour cream
2 tablespoons of butter

Combine the soup, sour cream and butter in a medium saucepan and whisk until all are combined. Continue to stir the sauce over medium high heat until sauce is hot and bubbly. Serve over chicken croquettes. Enjoy!

Photograph is copyrighted and the property of ©Welcome Home.
Print Friendly and PDF

Wednesday, October 08, 2014

WELCOME HOME MY FRIENDS.

Good morning friends. My windows are open and the curtains are swaying with the chilly Autumn breeze gently blowing in. I have a fresh batch of simmering potpourri on the stove top and there is a wonderful fragrance of citrus in the air from the lemon and orange peels I used.

I have just finished my coffee and have sat down to say hello. That's when I happened to notice that this blog has gotten over 4 million visits in the last year!

 I don't pay too much attention numbers, but I am staring at that numbers in total amazement and still wondering how that could be.

What is it about Welcome Home that brings people in? Is it the name? I remember two years ago when I wanted to start a Facebook page to preserve the memories of my Mom who moved to Heaven a few years before. I didn't know what to call it. I know I was missing her terribly that day and facing the fact that when she left, I felt so lost. I had lost my best friend and a Mother that loved me beyond anything imaginable and I was suffering that morning from the yearning and longing to just hug her once more. I can remember thinking not only did I lose her, but I had lost my home.

My Mom was our home. Everything that said "home" went with her when she moved to Heaven. The kitchen, once so full of love and activity, now sat so empty and quiet. There were no more wonderful smells coming from that old stove and the house was no longer filled with the wonderful aroma of homemade bread or heavenly pot roasts. There were no more pots on the stove filled with soups and stews and no more hot sizzling cast iron skillets filled with fried chicken or pork chops. She was gone and that kitchen would never again be the same.

She left at the beginning of spring and the garden also felt her loss. It would no longer produce so much life and energy. It would be empty now and so out of place without her in it. The front porch that we loved so much was now just a porch with a swing full of memories. And her beloved Lilac Bush even seemed to bloom less that year she moved. It was like life had just stopped all around that house when she left.

It just wasn't home anymore without my Mom. It was just a house. A building with rooms that no longer hosted her presence. It was so quiet and so empty and it seemed so dark. There was no bright sunlight shining in through the windows and no pretty flowers on the window sills. Her dainty curtains were no longer blowing in the breeze and gone were the wonderful fragrances of roses and lilacs from her garden nearby. It was just a house and it would be like that for the rest of my life.

I so missed that feeling of coming home. I wasn't only mourning the loss of the greatest love my life had ever known, I was also mourning the loss of home. All my life I knew I could always go home. No matter where I traveled or how hard the challenges of the world could be, I knew I could always go home and feel better about everything. It was the most wonderful place on earth. It felt safe and that same feeling I felt as a little girl was still there throughout all my life.

I felt that nothing bad could ever happen there. It was filled with so much love you could just feel it from the time you stepped through the gate and into the yard. As you entered the front door you knew you were going to be met with open arms that would wrap around you and make you feel wanted. It was a place that brought comfort and warmth and so many memories of years gone by. It was my safe haven and my place of refuge and I thought it would be there until the end of time. I was wrong.

So on that morning of October 27, 2012, I decided I wanted to create a page to keep my Mom's memory alive. I wanted to create my own feeling of home.....a feeling I missed so much. I wanted to create a place that brought back those memories and those feelings of walking up those front steps and into that loving place that said, "Welcome Home."

And so that would be the name I would call this little page and it was set only for me to do these writings about my life with my Mom. A page where I could possibly bring back those feelings of a place that I remembered. I would call it Welcome Home and create a place where I could maybe feel that comfort again with her old recipes, garden tips, and above all her every day wisdom and her intense love for God.

Little did I know that so many felt the same way when they lost that feeling of coming home. Maybe that's what brings you all here. Maybe I really have created that sense of warmth and love and comfort. Maybe I have stirred up those old memories and have brought comfort to many through a simple little page that reached so many hearts.

If I have made one person feel those feelings again.....and if I have been able to bring back that comfort to just a handful of people who lost it.....then I know that this was meant to be.

Welcome Home my friends. Welcome home.

~Marty
Print Friendly and PDF

Pasta and Italian Sausage Bake


I make this delicious dish often because to me it's the epitome of comfort food. Italian Sausage can be mild or spicy and you'll love the sauce! 

Pasta and Italian Sausage Bake

12 ounces dried farfalle (Bow Tie) pasta
4 mild or spicy Italian sausage links, cut into pieces
2 tablespoons butter
2 tablespoons Star Fine Foods Extra Virgin Olive Oil
1 14.5 oz can of whole Italian Tomatoes
1 teaspoon of butter mixed with 1 teaspoon of Parmesan cheese
1 small onion – minced
1 clove of garlic – crushed
2 tablespoons of fresh basil – roughly chopped
1 tablespoon of parsley, chopped
2 oz mascarpone cheese, room temperature
salt and pepper to taste
1 cup shredded Romano Cheese
1 cup shredded mozzarella cheese

In a large skillet melt butter and olive oil over medium heat. Add onions and garlic and cook under just tender. Add sausage links to skillet and saute until cooked and lightly browned. Remove sausage mixture to a bowl and cover with foil to keep warm. Add whole tomatoes and chopped basil to the skillet and stir. Add salt to taste. Lower the heat and simmer for about 20 minutes.

In the meantime, boil pasta in a large pot of water generously seasoned with salt. When pasta is cooked, reserve 1/2 cup of the cooking liquid and set aside. Return drained pasta back to the hot pot and add butter and Parmesan cheese mixture. Cover and set aside, off the heat. After about 20 minutes sauce should be ready. Transfer it to a blender or food processor or use an immersion blender to blend until smooth and creamy. Return to skillet and add the mascarpone. Season again if necessary at this point and add more if needed. If the sauce is too thick add a little of the reserved pasta water to thin.

Pour drained pasta in baking dish. Add just enough sauce over pasta to cover lightly and toss. Top with the sausage and sprinkle and top with Romano and then mozzarella cheese. Add more chopped basil and parsley and bake in a 350 degree oven until cheese has melted. Serve immediately. Add more sauce if desired at serving. 

Photo is copyrighted and the property of ©Welcome Home 2014


Disclaimer: I have an ongoing relationship with STAR Fine Foods for my recipes and photography using their wonderful products. This post is sponsored by STAR. I am compensated for my time and work and I am sent products as I request them. However, all opinions of the product stated in this post are 100% my own. I truly love their products!
Print Friendly and PDF

Chocolate Brownies with White Chocolate Buttercream


What's better than a decadent and delightful chocolate fudge-like brownie? That's easy...a decadent and delightful chocolate fudge-like brownie with white chocolate buttercream frosting and a cherry on top!

Chocolate Brownies with White Chocolate Buttercream Frosting

1/2 cup butter, cut into small pieces
3 oz. unsweetened chocolate, chopped
1-1/2 cup sugar
3 large eggs
1-1/2 teaspoons pure vanilla
1/4 teaspoon salt.
3/4 cup all purpose flour
 

 Preheat oven to 325 degrees. Line a 9 x 13 inch baking pan with parchment paper and then spray the paper with non-stick spray. I like to leave excess paper hanging over the ends so they are easy to lift out of the paper after baking.

Stir the butter and chocolate in a large heavy saucepan over very low heat until chocolate is melted. Remove from heat and whisk in the sugar, and then the eggs, 1 at a time. Add the vanilla, and salt and stir. Next add the flour a little at a time and stir to blend evenly. Pour batter into the prepared baking pan. Bake brownies about 20 minutes or until a toothpick inserted into center comes out clean with just a little batter attached. Remove brownies using parchment paper on ends to life and allow to cool completely on rack. Using a biscuit cutter or any large cookie cutter, press firmly into the cooled brownie.

White Chocolate Buttercream

1/2 cup Butter, room temperature
2 1/2 cups confectioners (powdered) Sugar
1 teaspoon Pure Vanilla Extract
4 oz White Chocolate, chopped and melted
2 tablespoons Heavy Whipping Cream

Using a mixer, first cream butter until soft and fluffy. Then mix in vanilla. Slowly add the powdered sugar a little at a time and mix well before adding more. Next mix in the melted white until incorporated. Finally add in the cream a little at a time and mix until frosting is at your desired consistency. Using a Ziploc bag with the corner snipped or a piping bag, pipe on incing to cover brownie and add a cherry on top!

Photographs are the property of ©Welcome Home and are copyrighted
Print Friendly and PDF

Vanilla Strawberry Cheesecake with White Chocolate Drizzle


When strawberries are out of season here in Maryland you find those big gargantuan California Strawberries in all the grocery stores.  They are just gorgeous and they always inspire me to make something wonderful. So I can never resist buying them. I always find something to make with them. How pretty is this!

Vanilla Strawberry Cheesecake with White Chocolate Drizzle


2 cups finely ground graham crackers (about 30 squares)
1/2 teaspoon ground cinnamon
1 stick unsalted butter, melted                                                      

2 (8-ounce) blocks cream cheese, softened                                    
3 eggs                                                                                 
1 cup sugar
1 pint sour cream
2 teaspoons lemon zest
1 teaspoon pure vanilla extract

Preheat the oven to 325 degrees. In a mixing bowl, combine the ingredients with a fork until evenly moistened. Lightly coat the bottom and sides of an 8-inch springform pan with non-stick cooking spray. Pour the crumbs into the pan and, using the bottom of a measuring cup or the smooth bottom of a glass, press the crumbs down into the base and a little up the sides. Refrigerate for 5 minutes.


For the cheesecake:                                                                 


In the bowl of an electric mixer, beat the cream cheese on low speed for 1 minute until smooth and free of any lumps. Add the eggs, one at a time, and continue to beat slowly until combined. Gradually add sugar and beat until creamy for 1 to 2 minutes. Add sour cream, lemon zest, and vanilla. Periodically scrape down the sides of the bowl and the beaters. The batter should be well-mixed but not over beaten. Pour the filling into the crust-lined springform pan and smooth the top with a spatula.

Set the cheesecake pan inside another slighly larger pan. This outer pan will keep the water from seeping into the cheesecake when you put both pans in a water bath. Set both pans in a large roasting pan. Pour boiling water into the roasting pan until the water is about halfway up the sides of the outer pan.

Bake for 45 minutes. The cheesecake should still jiggle (it will firm up after chilling), so be careful not to overcook. Let cool in pan for 30 minutes. Chill in the refrigerator, loosely covered for at least 4 hours. Loosen the cheesecake from the sides of the pan by running a thin metal spatula around the inside rim. Unlock springform pan and transfer cake to a cake plate.

Whipped Cream

1 teaspoon unflavored gelatin
4 teaspoons cold water
1 cup heavy whipping cream (also known as whipping cream or full cream)
1/4 cup confectioner's sugar
A handful of large California Strawberries or the largest you can find.

In a small pan, mix together gelatin and cold water and let stand until thick. Place over low heat, stirring constantly, just until the gelatin dissolves. Remove from heat; cool but do not allow it to set up. Whip the cream with the confectioner's sugar, until slightly thick. While slowly beating, add the gelatin to whipping cream. Whip at high speed until stiff. Pipe cream on top of cake in little mounds to support your big strawberries.


White Chocolate Drizzle

3/4 cup white chocolate chips
2-3 tablespoons heavy cream

Melt chocolate chips and heavy cream in double boiler until melted and smooth. Drizzle over strawberries and let harden, about 20-30 minutes.


Photographs are copyrighted and the property of ©Welcome Home

Print Friendly and PDF